Showing posts with label Baking. Show all posts

Tuesday, September 23, 2008

My favourite Apple Cake!!!

There is nothing more soothing than the aroma of
freshly baked apple cake with cinnamon!!

Fall has arrived and so does the season of Apples arrive. I first tasted this Apple cake at one of my friends baby shower. As a foodie you know, without much hesitation I asked my friend the recipe for the fabulous cake. Since then I have been baking this cake for more than 3 years now. This recipe is for a keepsake, tried and tested for sure! Coz it won't betray you nor abandon you.

I baked and gifted this cake to most of my friends and they can verdict about its taste and texture. I often bake them with Gala Apples when I don;t get hold of Green Granny Smith Apples. I sometimes bake it in a tube pan, sometimes in a bundt pan, sometimes in round and sometimes in a rectangle pan. It is totally up to you! So I can say this is such a versatile recipe and can accommodate in any kitchen.

here is my slice of cake!


Apple Cake

Recipe Source: Friend

Cuisine: International Cuisine ~ American
Preparation time: 25 minutes
Cooking time: 50 - 80 minutes

Ingredients:
For Cake:
Butter, for greasing pan
3 cups all-purpose flour
2 cups sugar (you can reduce to 1½ cup)
1 tsp baking soda
¼ tsp salt
1 tbsp cinnamon powder (I use 1 tsp)
3 eggs
1½ cups vegetable oil
¼ cup orange juice
1 tbsp vanilla extract
3 cups Apples, cored, peeled and finely chopped (pref. Granny Smith apples)
1 cup shredded coconut
1 cup chopped almonds (any nuts)
For Sauce:
½ cup (1 stick) butter
1 cup sugar (you can reduce to ¾ cup)
½ cup buttermilk
½ teaspoon baking soda

Method:
  • Preheat the oven to 325°F[165°C]. Generously grease a tube pan.
  • For cake: In a large bowl, combine sugar, eggs, oil, orange juice, flour, baking soda, salt, cinnamon and vanilla extract; and mix well.
  • Fold apples, coconut, and pecans into batter.
  • I used a Bundt cake pan and a normal round cake pan for baking this cake.
  • Pour the batter into the prepared pan and bake until a tester comes out clean, about 1½ hours.
  • Shortly before the cake is done, make the sauce.
  • For Sauce: Make sauce in a deep pan else it will overflow when it starts boiling.
  • Melt the butter in a large saucepan, stir in sugar, buttermilk, and baking soda, and bring to a good rolling boil, stirring constantly.
  • Boil for 1 minute. Pour the sauce over hot cake as soon as you remove it from oven.
  • Let stand 1 hour, then turn out onto a rack to cool completely.Cut into pieces and serve. It tastes better when served cold.
  • I bake my cake a little longer to get a nice, yummy crust. I love it that way!

Sending this photo to Click-Sep 2008

Friday, August 29, 2008

Ginger Peach Muffins


They were over so soon that I was able
to take photo
of these leftover muffins next day!

My Farm picking has indulged me in many new and different recipes. I loved cooking and serving the new recipes and each one is close to my heart. This ginger peach muffins I made for adorable Yash (my friend's kid) on his birthday. You must have seen him in the farm picking photos I posted previously. I found this recipe very fast, simple and easy.


Ginger Peach Muffins
Source: Virtual Cities
Cuisine: International ~ American
Prep time: 20 mins
Baking time: 25-30 mins
Serves: 6-8 people

Ingredients:
2 cups flour
½ cup sugar
2 tsp baking powder
½ tsp baking soda
½ tsp salt
2 eggs
½ cup butter, melted
1 cup plain yogurt
2 tbsp finely chopped crystallized ginger
1 cup fresh peaches, peeled and finely chopped
½ cup chopped pecans
Method:
  • Preheat oven to 400 °F [205°C]. Grease muffin tin with butter and set aside.
  • In a large bowl, combine dry ingredients.
  • In another bowl, combine egg, yogurt, and butter, then add ginger, peaches, and pecans.
  • Fold egg mixture into flour mixture. Fill greased muffin ½ to 2/3 full.
  • Bake in a 400 °F [205°C] oven for 25 minutes.
Variations: you can use nectarine instead of peaches
Other baking goodies from my kitchen:
Red Currants Mini Tarts
Cherry Rose Rolls
Buttermilk Blueberry Muffins
Banana Chocolate Chip Muffins

Ginger Peach Muffins


They were over so soon that I was able
to take photo
of these leftover muffins next day!

My Farm picking has indulged me in many new and different recipes. I loved cooking and serving the new recipes and each one is close to my heart. This ginger peach muffins I made for adorable Yash (my friend's kid) on his birthday. You must have seen him in the farm picking photos I posted previously. I found this recipe very fast, simple and easy.


Ginger Peach Muffins
Source: Virtual Cities
Cuisine: International ~ American
Prep time: 20 mins
Baking time: 25-30 mins
Serves: 6-8 people

Ingredients:
2 cups flour
½ cup sugar
2 tsp baking powder
½ tsp baking soda
½ tsp salt
2 eggs
½ cup butter, melted
1 cup plain yogurt
2 tbsp finely chopped crystallized ginger
1 cup fresh peaches, peeled and finely chopped
½ cup chopped pecans
Method:
  • Preheat oven to 400 °F [205°C]. Grease muffin tin with butter and set aside.
  • In a large bowl, combine dry ingredients.
  • In another bowl, combine egg, yogurt, and butter, then add ginger, peaches, and pecans.
  • Fold egg mixture into flour mixture. Fill greased muffin ½ to 2/3 full.
  • Bake in a 400 °F [205°C] oven for 25 minutes.
Variations: you can use nectarine instead of peaches
Other baking goodies from my kitchen:
Red Currants Mini Tarts
Cherry Rose Rolls
Buttermilk Blueberry Muffins
Banana Chocolate Chip Muffins

Wednesday, August 27, 2008

Red Currants Mini Tarts


After spending an exhaustive but enjoyable day at farm picking, my home was filled with fresh fragrance of berries, peaches and currants. But I remained stuck on how to use the whole bunch. World wide web was at rescue for me and soon I started browsing different recipes using my farm picks. And I am really happy that I was able to visit Delicious Days for one such incredible recipe I am blogging today.

Mini Tarts

Red Currant Mini Tarts

So
urce: Delicious Days
Cuisine: International Cuisine
Prep time: 20 mins
Baking time: 30 mins,
Serves: 4-5

Ingredients for crust:
1 cup all purpose flour
¾ stick (6 tbsp) cold butter
¼ cup icing sugar
a pinch of salt
Ingredients for topping/filling:
2 cups red currants
2 eggs
4-5 tbsp brown sugar
nearly
½ cup heavy cream
more icing sugar for decoration
Method:
  • For crust: I did not use egg yolk as suggested in the original recipe. Chop the cold butter into a inch size cubes, that way it will be helpful in kneading the dough, another foodtv tip.
  • I sieved all purpose flour and icing sugar together, add cold butter and knead together as if we do for chapati dough. Form a ball, cover it with plastic wrap and keep it in refridgerator for about an hour.
  • Then roll it out about half a centimeter thick (dust board with flour as needed) and press into 12 cm (~5 inch) buttered flan tins (I did not have these so used mini tarts instead).
  • Repeatedly poke a few holes across the bottom, line with parchment paper and add pie weights (I used decorative pebbles. Rice, dry beans work, too) and pre-bake them in the oven at about 350°F (175°C) for about 10 minutes. Take the crusts out, remove the baking weights and let them cool down.
  • For filling: Remove red currants from the stems, wash them and pat dry with a kitchen towel. Arrange berries on the dough.
  • Combine eggs with heavy cream and brown sugar, beat with a hand blender until you have a homogeneous mixture and pour over the currants (about two thirds the height of the red currants, because the mixture will rise a bit)
  • Bake at 355°F (180°C) in the oven for 20 minutes or until lightly browned, remove and let chill. Dust with icing sugar, if desired.
  • Best eaten still a little warm or on the next day..
I liked it on the next day more...
Thanks Nicky and Oliver for this wonderful recipe.

Monday, August 11, 2008

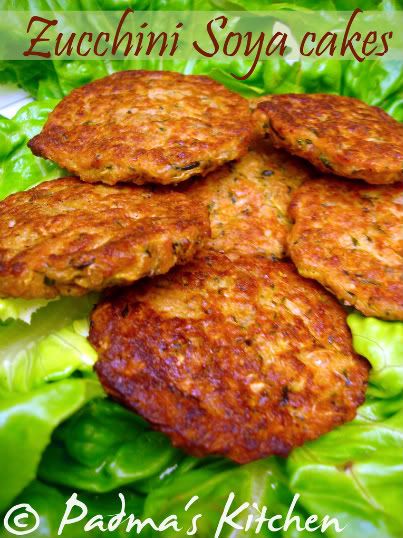
Healthy Zucchini Soya Cakes

Healthy & Tasty Zucchini and Soya cakes

Summer is here and so are the garden fresh veggies and herbs sizzling around in everyone's backyard. Well I don't have a backyard!! but can always count on endless supplies of garden fresh beauties from our local farmer's market. I believe in buying the local produce, so that you can help reducing the growing fuel use. A little effort goes a long way to curb global warming. And to top it homemade breads, pies and ice creams are a bonus to get the taste of homemade goodies.

Last week I bought some Zucchini and thought of grilling them, but instead ended up making cakes with them. When Sia of Monsoon Spice announced about JFI-Soya started by Indira of Mahanandi. I thought of making some zucchini cakes with soya chunks and soya flour for this event. JB loves to have snacks in the evening after a tiring day at work., though only few times I surprise him with some Indian fritters, snacks and salads, sad huh!

This is a very simple recipes and you can play around the ingredients pretty smoothly. I adapted this recipe from FoodTv ~ Paula Dean show. I added soya flour instead of the traditional A-P Flour (maida). Play with your veggies and you will create a fabulous snack item. Grated carrots, squash (yellow & green), green onions etc can be added too. Eat it with your favorite sauce, yogurt dip, chutney or simply with ketchup!

Cuisine: American, International
Prep time: 10 mins
Bake time: 30 mins
Makes: 8-10 cakes
Serves: 2-3
Ingredients:
1 Zucchini, grated

½ C Soya chunks, dried ones
2 T Soya Flour
2 T bread crumbs, seasoned
1 T extra virgin olive oil

1 large egg, lightly beaten
1/4 t garam masala powder or any spice mix of your choice (optional)
1/4 t cayenne pepper/chilli powder
freshly grounded black pepper
salt to taste
Oil spray

Method:
  • Grate the zucchini and drain the liquid by placing the shredded zucchini in a colander for 20 mins or place it in between two kitchen towels or papers and gently press. The extra liquid will be soaked up in the paper/towel.
  • Pre heat oven to 350 F (177 C), arrange aluminum foil on a large baking sheet and oil spray it.
  • Put the dried soya chunks in hot water, let it stand for 10 mins, squeeze the extra liquid out of it and shred them in a food processor. Shredded soya chunks it will look like ground kheema (goat/lamb meat).
  • Place shredded zucchini in a large bowl, add shredded soya, soya flour, bread crumbs, extra virgin olive oil, salt and freshly ground black pepper. Mix well and add chili powder/cayenne pepper, garam masala or any spice mix of your choice or you can opt it out completely.
  • Add lightly beaten egg and mix well shape the mixture into patty form. Place them on the baking sheet and spray once again over the patties.
  • Bake them for 30 mins turning the sides once for even cooking on both sides.
  • Serve hot with your favorite dip, chutney or sauce.

Variation:
  • If you don't have oven no worries! you can shallow fry them with little oil in a large pan just like you'd fry some ragda patties :)
  • You can add shredded carrots, cucumber, squash (yellow and green), green onions, shredded tofu/paneer (Indian cottage cheese) for variety of taste.

Thursday, August 7, 2008

Everything about Sourdough

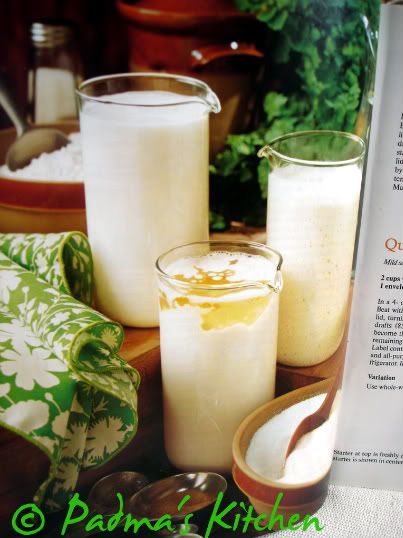
Sourdough Starter


Remember two weeks back I blogged about Cherry Rose Rolls on my blog, In my post I promised I will be posting about sourdough. These days I am hooked to Rita Davenport's 'The Sourdough Cookbook'. This book has some incredible and yummy recipes for all, from breads, rolls, twists, biscuits, muffins to pancakes, waffles, cakes, cookies & brownies and main dishes too! Awesome, isn't it? I am drafting some of the goodies from her book in my blog.

The story of Sourdough
For centuries, sourdough was a mystery. According to one historical account, sourdough was discovered in the days of the Egyptian Pharaohs, about 5,000 years ago. An Egyptian noticed that some flour he left in an uncovered container had become wet and bubbles had formed in the mixture of flour and water. Not wanting to waste the dough, the Egyptian used it to make bread dough. The bread baked from this mysterious dough had a light texture and a tantalizing flavor.

Today we know that moisture, wild airborne yeast and possibly some lactic acid bacteria fell into the open container of flour, causing fermentation. Yeast is a
plant fungi that ferments certain kinds of sugars in flour and produces carbon dioxide. This expands the dough in baked products, making them light and porous.

Although sourdough is a heritage from our past, it's an enjoyable part in our lifestyle today. Sourdough is natural. Homemade sourdough products contain few or no preservatives. They are inexpensive source of vegetable protein, carbohydrates, important minerals and B vitamins.

Baking with Sourdough
The basic ingredients in many sourdough recipes are sourdough starter, flour, liquid, sugar, eggs, fat and salt. Use the best available ingredients. The finished product is only as good as the ingredients that go into it.

Sourdough Starter can be obtained by mixing the ingredients together yourself or by obtaining a cup of starter from someone else. The older the starter, the more tangy flavor. Because of variations in flour, water composition and local atmospheric conditions, you may find one starter recipe works better for you than another.

Flour is the major ingredient in most of sourdough recipes. All-purpose or whole-wheat flours are used in all recipes. Rye flour is used in combination with wheat flour in some breads. Stir flour gently before measuring it to eliminate the need of sifting.

Milk, water or fruit juices are used in most sourdough recipes.

Sugar and other sweeteners provide flavor, color and texture in baked foods. Each sweetener has a delicate but distinctive flavor. Sugar blends well with the flavors of other ingredients. Honey and molasses are used as substitutes in several breads and cookies.

Butter, margarine, shortening or oil are used to tenderize baked products and to enhance the flavors of other ingredients.

Temperature is an important factor in the success of a sourdough recipe. Sourdough must ferment and rise at a temperature close to 85F (30C).

Mix sourdough recipes in glass, stoneware or plastic bowls using wooden or plastic spoons. Any prolonged contact with metal will change the flavor. Store sourdough starter in a stoneware, glass or plastic container. The container should be large enough to allow for expansion of the starter to twice its original size. Be sure there is a small hole in the top of the container or the lid is ajar to let accumulated gas escape and for yeast to get air.

If the mixture turns pink or orange, or if the starter is not replenished every seven to ten days, it may spoil; d
iscard it immediately and start over. Don't discard the starter just because its age, merely replenish it. Occasionally pour all of the sourdough starter into a mixing bowl. Wash the storage container to remove flour buildup. If you are not using the starter for a while, it can be store in the freezer up to three months.

How to make sourdough


For Basic Sourdough Starter
Use this starter in most of the recipes which calls for sourdough

Ingredients:
2 C all-purpose flour
3 T sugar
1 envelope active dry yeast(1 T)
1/2 t salt, if desired
2 C warm water
Method:
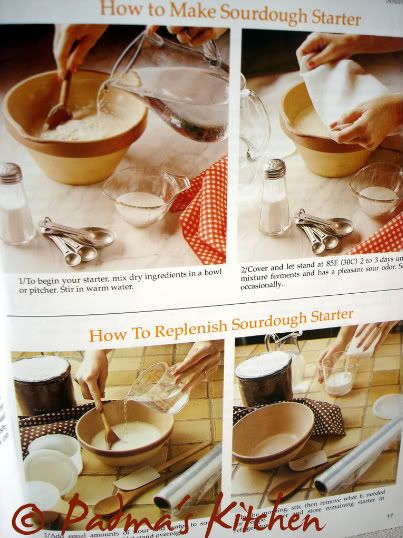
  • In a 4 or 6 cup or plastic pitcher or in a large bowl, combine all ingredients. Beat with a wooden or plastic spoon. Fermentation will dissolve small lumps.
  • Cover pitcher or bowl with lid. Cover bowl with a cloth. Set in a warm place free from drafts (85F, 30C). Let it ferment 2 to 3 days. Stir mixture several times each day.
  • To use, remove starter needed for recipe. Refrigerate remaining starter in pitcher or in a plastic container with a lid that has an air vent or hole in it. Label container with contents.
  • Replenish every 7 to 10 days by stirring in equal amounts of water and all-purpose flour. After replenishing, let stand at room temperature overnight. Return to refrigerator. If a clear liquid forms on top, stir back into starter.
  • Makes 3 to 4 cups.
Quick Overnight Starter
Mild sourdough flavor in a hurry. Double the recipe if you plan to do lots of baking.


Ingredients:

2 C warm water (105F, 40C)

1 envelope active dry yeast (1 T)

2 C all-purpose flour

Method:
  • In a 4 or 6 cup plastic pitcher or in a large bowl, combine all ingredients. Beat with a wooden or plastic spoon. Fermentation will dissolve small lumps.
  • Cover pitcher or bowl with lid. Cover bowl with a cloth. Set in a warm place free from drafts (85F, 30C). Let stand 6 hours or overnight. Starter will ferment, increase in size, then become thin and decrease to original size.
  • To use, remove starter needed for recipe. Refrigerate remaining starter in pitcher or in a plastic container with a lid that has an air vent or hole in it. Label container with contents.
  • Replenish every 7 to 10 days by stirring in equal amounts of water and all-purpose flour. After replenishing, let stand at room temperature overnight. Return to refrigerator. If a clear liquid forms on top, stir back into starter.
  • Makes about 3-1/2 cups.
Variation: You can use whole-wheat flour in place of all-purpose flour.

Causes for Inferior Bread
  • Poor texture or colour, low volume or heaviness ~ Inferior flour, oven temperature too low, over rising, milk not scalded.
  • Coarse texture or dry crumb ~ Too much flour, under-kneading, over-rising, milk not scalded.
  • Undesirable flavour ~ Over-rising, inferior yeast or flour, too high temperature while rising, oven temperature too low, under-baked.
  • Bread won't rise ~ Weak or inactive yeast, dissolving yeast in water that is too hot.
  • Streaks through loaf ~ Poor mixing, under-kneading, too much flour on board, top of dough drying before shaping, using greased hands to shape loaves.
  • Uneven shape ~ Too much dough for pan, improper molding or shaping, over-rising before baking, rising in a draft, pans touch in oven.
  • Flat loaf that browns too quickly ~ Yeast killed with hot water, under-rising of loaf, over-rising of loaf which falls in center before completely baked.
  • Porous bread with pale crumbling crust ~ Over-rising, too much flour, dough too stiff.
  • Thick crust ~ Over-rising, under-kneading, oven temperature too low.
  • Cracks in sides or top of crust ~ Dough too stiff, under-kneading, uneven heat in baking, too rapid cooling in draft.
  • Tough crust ~ Inferior flour, too much salt, too much handling, needs more shortening.
  • Pale crust ~ Too little sugar, too much salt, drying of dough during rising, oven heat too low.
  • Bulging crust ~ Under-kneading, dough not punched down before shaping, loaf molded without removing gas bubbles, over-rising.
Storing Sourdough Baked Goods : The absence of chemical preservatives and the presence of healthy, active yeast in sourdough call for special storing.
  • Sourdough products will keep for two or three days at room temperature in bread boxes or other containers that retard drying. Wrap baked goods securely in plastic wrap or foil.
  • To keep baked items for several days, wrap them well and refrigerate them.
  • Sourdough baked goods can be frozen up to three months.
photo source: taken from "The Sourdough Cookbook"
by Rita Davenport

All recipes in this book calls for using sourdough starter, the recipe is given below which has two variations, one which sits for 7-8 days and other is an overnight quick recipe for sourdough starter. There are many more recipes we can make out of this starter. Its up to you to explore. I will post few which I tried out.

I hope you all must not be intimidated to try some baking with Sourdough starter, but I can assure you that its pretty easy to start. Hope my post inspires you to start baking some breads, rolls and many more goodies from sourdough starter.


Monday, July 21, 2008

Cherry Rose Rolls


Impressive appearance matched only by their delicious flavor

Baking is an art and I am still a learner. In India we never owned an oven to try all those baking goodies at home. If we felt like eating cakes, breads, delicious pastries and rolls we used to depend on small bakeries in our town. I remember when I was in 12th standard Monginis was the first ever brand name in baking I knew of! So after coming to land of opportunities[US], baking is one amongst other few arts which I learned here. More on how I used my oven when I was new to it, you can read it from here.

I slowly gained momentum in baking all the goodies and well but consider myself still at a learning stage only. Last week I brought some books on baking from our local library. Cherry rose rolls caught my eyes while browsing out for some new recipes from the Sourdough Cookbook by Rita Davenport. For more on
Baking with the Sourdough, I will draft few points from this book and post it separately for all Enthusiastic Bakers. Keep watching!!


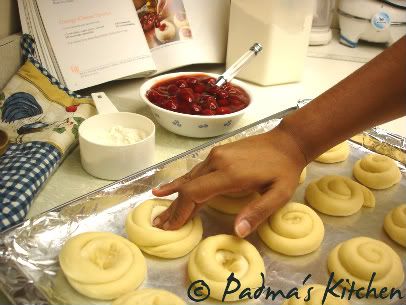
Here are some snaps on 'The making of Cherry Rose Rolls'


Kneading the dough

Shaping the rolls

let them rise!


Making indentations


Spooning the cherry filling

Source: The Sourdough Cookbook by Rita Davenport
Cuisine: American
Prep time: 3 hours
Cooking time: 20 minutes
Makes 24 to 30 rolls
Serves: 10-12
Ingredients:
3/4 C milk

1 envelope active dry yeast (1T)

1/2 C water

1 C sourdough starter

1/2 C butter or margarine, melted
1/2 C granulated sugar

1-1/2 teaspoons salt

3 to 4 C all-purpose flour

1 (21 oz) can cherry pie filling

For decorating:
1 C powdered sugar

1 t vanilla extract
1 T milk


Method:
  • In a small saucepan, heat 3/4 cup milk almost to a boil over medium heat. Do not boil. Set aside to cool 10 minutes.
  • Sprinkle yeast over water, set aside to soften 5 minutes.
  • In a large bowl, combine sourdough starter, cooled milk, softened yeast mixture, butter or margarine, granulated sugar and salt. Stir in enough flour to make a soft dough.Turn on to a lightly floured surface. Clean and grease bowl; set aside.
  • Knead dough 5 to 8 minutes or until smooth and elastic. Add more flour if necessary. Place dough in a greased bowl, turning to grease all side. Cover with plastic wrap. Place in refrigerator 2 hours or overnight.
  • Grease a large baking sheet; set aside. Punch down dough. Turn onto a lightly floured surface. Divide dough into 24-30 equal pieces.
  • Gently roll each piece between your hands to a 12-inch rope. On prepared baking sheet, loosely coil each rope, tucking end of rope under coil.
  • Leave 2 inches between coiled ropes. Cover with a cloth and set in a warm place free from drafts. Let rise 1 to 2 hours or until doubled in size.
  • Preheat oven to 400F (205C). Press the center of each roll with your fingers until you touch baking sheet. Make indentations about 1 inch wide.
  • Spoon cherry pie filling into each indentation. Bake in preheated oven 15 to 20 minutes or until golden brown.
  • Remove from baking sheet, cool on a rack.
  • For decorating, In a small bowl, combine powdered sugar, vanilla and 1tablespoon milk, Beat until smooth. Spoon into a pastry bag. Decorate rolls by pressing mixture through a tip with small opening.


This weekend (19th July 2008) we went to Dorney's Park near Allentown, PA. It has both Wildwater Park and Amusement Park. We thoroughly enjoyed and had aches and sores by the end of the day! I took these rolls for snacking and everyone in our group enjoyed having them. So, its a nice picnic snack too!

I am sending this to Bread Baking day - Small breads event started by Zorra and hosted by Aparna of My Diverse Kitchen

And to Susan for YeastSpotting

more baking from my kitchen:
Buttermilk Blueberry Muffins
Amish Zucchini Bread
Banana Chocolate chip Muffins


Saturday, January 19, 2008

Buttermilk Blueberry Muffins

soft, fluffy and juicy Buttermilk Blueberry Muffins

Cup cakes or muffins or whatever you call, they are one of my favorite snacks when I have baking sessions. There is still so much of learning process going on with my baking and using oven. I tried different muffin-recipes but always ended up with very dry and hard ones. Finally I got hold of a very good one which leaves the muffins moist from inside and fluffy and soft all over even after 2-3 days kept at room temperature stored in not so air-tight container. The search for a perfect blueberry muffin recipe is over, for me ;) after I tried and tested this recipe from Recipezaar.com.


slice me up!

Cuisine: International ~American
Prep time: 20 mins
Cooking time: 30-35 mins
Serves: 8-10 people
Ingredients:
1C fresh blueberries or frozen (unthawed)
2C all-purpose flour(unbleached), plus
1T all-purpose flour(unbl)
2/3 C granulated sugar
2t baking powder
1/4t baking soda
1/2t ground cinnamon
1/4t salt
1 large egg (or 1/4 C orange juice)
1 1/4C buttermilk
1t vanilla extract
3T unsalted butter, melted and cooled
for Crumble topping(optional):
1/4C all-purpose flour (unbl)
1/2t ground cinnamon
1/4C firmly packed light brown sugar
2T unsalted butter, cut into 1/2 inch pieces
Method:
  1. To make the bluberry muffins: preheat the oven to 375 degrees F. generously butter or grease the muffins cups/tins.
  2. If using fresh blueberries, rinse and thoroughly dry the berries. In a small bowl, toss the fresh or forzen berries with the 1t flour.
  3. In a large bowl, sift together 2C flour, baking powder, baking soda, cinnamon. Add sugar and salt, stir well so that all the ingredients mix well.
  4. In a medium bowl, whisk together the egg and 1C of buttermilk until combines, whisk in the vanilla and melted butter.
  5. Pour the buttermilk mixture into the well, begin stirring the liquids, gradually drawing the dry ingredients into the well until they are blended well. If the mixture is to thick add theadditional 1/4C of the buttermilk and gently mix.
  6. Add the blueberries and fold in just to distribute evenly taking care not to overmix.
  7. Evenly divide the batter among the prepared muffin cups
  8. To make the crumble topping (optional): In a small bowl, combine the flour, cinnamon and brownsugar. Add the butter pieces and cut into the sugar mixture with a pastry blender until the topping looks like crumbled
  9. Evenly divide the crumble topping among the muffins, sprinkling it on top.
  10. Bake the muffins for 30 to 35 mins, or until a toothpick inserted into the center of a muffin come out clear. Cool in the pan on a wire rack for 10 mins, then carefully turn out onto the rack.
  11. Serve warm, or cool completely. Store in an airtight containers at room temperature for up to 2-3 days.

Variations: You can choose to add your favorite berries, cherries or any dry fruits according to your taste.


Sunday, October 7, 2007

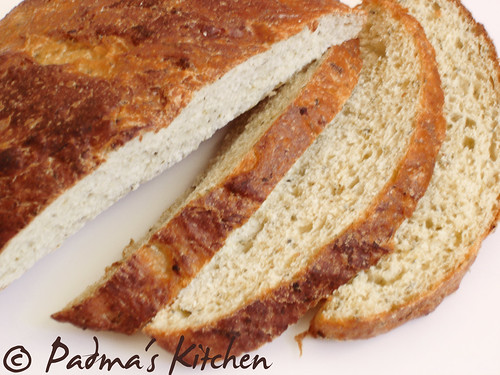
Amish Friendship Zucchini Bread

Amish Friendship Zucchini Bread

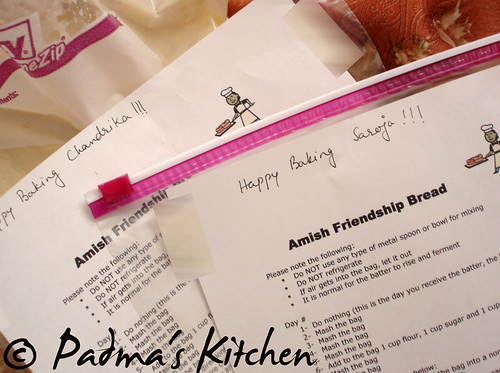
I was thrilled to open my packet of Amish Friendship Bread Starter, received from Laavanya. I quickly opened it to check the content and was little scared about the gooey-creamy like thing. This starter has to be nourished while left for fermenting for 9 days, and we bake it on the 10th day or freeze it and save for later. I received my starter on Day 3

On days 2 through 5, just mash the bag and remove excess air, if any.
On day 6 stir in 1 cup each sugar, flour and milk, mash the bag.
On days 7 through 9, mash the bag.
On day 10 stir in 1 1/2 cup each of flour, milk, sugar. Mix well and distribute 4 cups equally. Keep 1 cup of starter for myself and share the other 3 with friends.


After much research on AFBS, I came to know that cooks have been baking with starters for thousands of years. Sometime back before the ancient Egyptians, however, bakers learned that if they captured airborne wild yeast and fed and nurtured it properly, they could produce an endless array of breads, cakes, pancakes, biscuits, scones, muffins, rolls, all light and fluffy and made possible by the hard-working little fungi (yeast). Article Source: Texas Cooking

This is the first time I am trying my hands on baking bread and decided to bake a more traditional bread than something like cake/muffins/rolls/buns. This way I can teach myself to handle more of tough bakes. I brought some books on baking from local library and found this very nice and interesting recipe for Zucchini bread.

I used coarsely grated zucchini shreds which offers color and just-perceptible contrast of texture to the bread. Because it is exceptionally moist, zucchini must be salted and squeezed to rid of it excess liquid before it is mixed with the flour, starter and water. It took me two days to make this bread and learned some new techniques in baking. Like overnight standing ~ to raise and humidified baking with boiling water in the bottom to ensure crunchy bottom crust.

My first bread baking session

Zucchini Bread

Source : Breads, Time-life books
Cuisine: International

Prep time: 10 mins and left overnight to rise
Cooking time: 40 mins
Makes: 7-inch cylindrical loaf

Ingredients:
2 1/2 cups flour
1/2 cup amish friendship bread starter
2 zucchini, medium-size, washed ends trimmed off
1 tbsp salt
3/4 cup tepid/warm water
olive oil or 1 egg yolk beaten
Method:

1. Coarsely grated zucchini into a deep wide bowl. When the zucchini gratings cover the bottom of the bowl, sprinkle them with salt. Grate in another layer of zucchini and sprinkle again with salt. Repeat alternate layers if zucchini and sprinkle again with salt. Leave it for 30 mins so that the salt will draw out the excess moisture. Then press out the moisture by squeezing the zucchini in your hands.

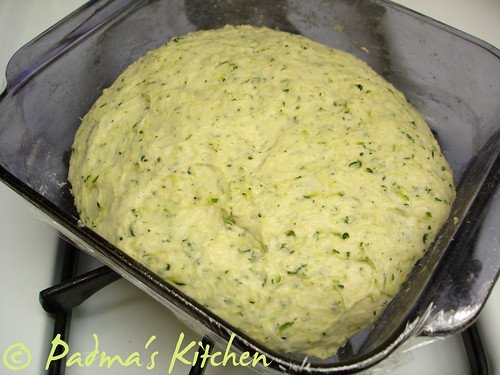
waiting to Rise!!!

2. In another bowl combine the starter, flour, salt and thoroughly mix zucchini, add enough tepid water to make a smooth but fairly firm dough. Knead the dough well for about 10 mins. Return it to the bowl, cover it with a damp cloth towel or plastic wrap and let the dough rise for about 2 hours.
Knead the dough into a loose round, then shape it into a tapered cylindrical loaf. Lay it on a buttered baking sheet, cover it with a towel and let it rise in a warm place until doubled in bulk or left overnight.

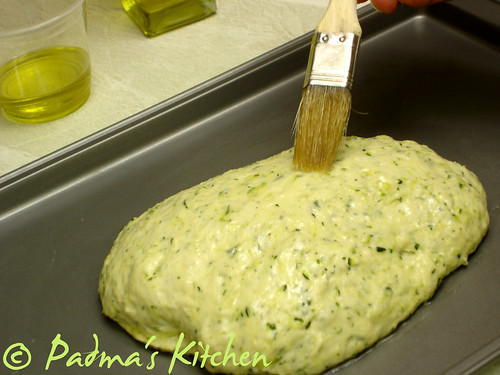
brushing olive oil to prevent zucchini from burning!


3. Just before baking, brush the loaf with olive oil or egg yolk to prevent the pieces of zucchini on the surface from burning. Preheat the oven to 425, place a roasting pan filled with 1 1/2 inch of boiling water in the bottom of your oven. Bake the bread in a humidified 425 degrees F for about 40 minutes, until the bottom sounds hollow when rapped, while checking the water in roasting pan every 10 mins. Cool the loaf on a wire rack.

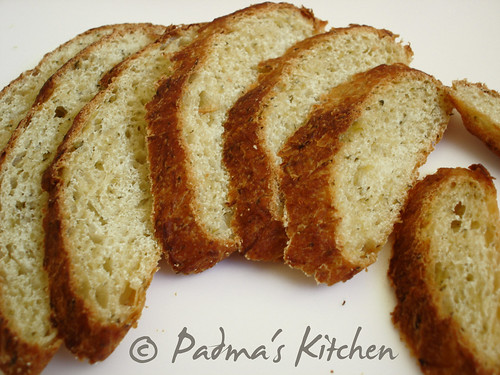
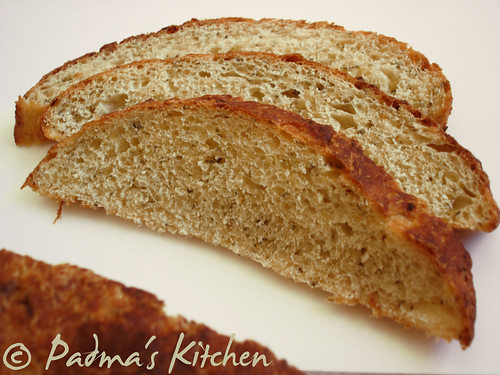
Zucchini bread slices

I am sending this starter to two of my dear friends Chandrika and Saroja to keep the tradition. Hope you guys will enjoy baking with it, as well!


starters dispatched, let me know when they arrive!


Sunday, September 23, 2007

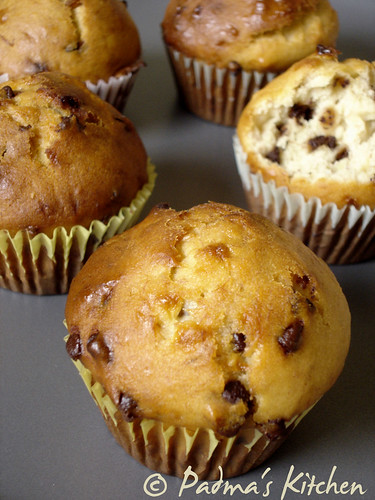
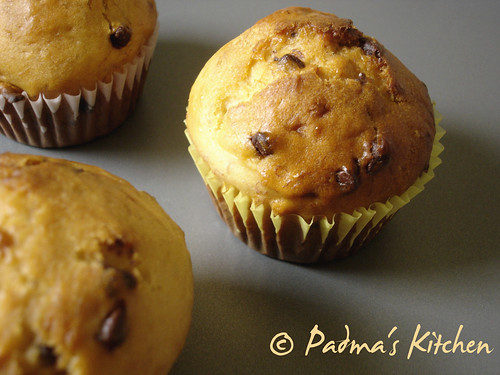
Banana Chocolate chip muffins


Gorgeous looking Muffins

Baking happened to me when I came to US, back at my mother's place in Bombay my kitchen endeavors were very minimum. Never helped her in kitchen, but I did other things like decorating my house, cleaning, gardening, taking care of my fish tank, arts & crafts etc..etc. We did not have oven or microwave there so there were no baking sessions at home except that my mother used to bake tutty-fruity round cake in an old styled aluminum vessel we get in India.

USA- Land of opportunities was like exploring things in and around New Jersey and also in my kitchen too. I landed in US in Nov-2004 and my first baking session started with a birthday cake for JB (after 3 months). I was so scared to touch the oven so I used it to store dishes. Operating oven and dishwasher was totally new to me and I took the help of my childhood friend Lalita initially, (sigh) now I laugh looking back to myself.

Since then I was playing around with my oven and baking things. I have noticed that I didn't post any baking recipes so far on my blog so taking this opportunity to post this incredible recipe from My favorite cook book, Kid's Snacks from Better Homes & Gardens. I purchased this book at my local Library sale. I don't have much collection as I did not bring any books from India. Since luggage weight is the main factor to carry things from India to set up a new life in US, books and wedding album were last on my priority list. I know many of us can relate this story of mine with your initial days in US :)

Kid's Snack is a wonderful collection of easy and beautiful looking recipes, kid's love. I also have some other books on healthy home cooking, 101 pasta recipes, low carb diet which I bought from library sale, I tried some of them and much satisfied with the taste but will showcase sometime later on my blog.


thats me!

As Nags asked us to write in one line, I love this book to " Treat the Kid in me" Sending this post to Nags for Show me your cook books event and to JFI-Banana hosted by Ahaar.

Source : adapted from Kid's Snacks
Cuisine: American
Prep time: 10 mins
Baking time: 25 mins
Makes: 6 people
Ingredients:
1 large egg
3 tbsps vegetable oil
3 tbsps milk (I used 2% milk)
3 tbsps orange juice
1 tsp vanilla extract
2/3 cup mashed ripe bananas (about 3 medium bananas)
2 cups all purpose flour (unbleached)
½ cup castor sugar
1 tbsp baking powder
½ tsp salt
1/2 cup dark chocolate chips/morsels
Method:
  1. Preheat the oven to 350°F
  2. Place the egg, oil, mashed bananas, orange juice, vanilla extract and milk in a mixing bowl and beat together with your hand mixer.
  3. In another bowl sift the flour, sugar, salt, baking powder mix.
  4. Pour in the liquid into the dry mix and stir until just blended.
  5. Add chocolate chips and stir one more time.
  6. Line a muffin tray with paper muffin cases, spray with non-stick spray and then fill each case to just below the muffin tray level.
  7. Bake for about 20 minutes, reducing heat towards the end of baking if the top of the muffins gets brown quickly.
  8. This recipe makes 10-12 muffins, depends upon the tray size you use, I used 2 ¾” size here.
  9. They taste better the next day, just m/w for 10 seconds and its ready to munch on!


Banana Chocolate chip muffins


Related Posts with Thumbnails