Showing posts with label Zucchini. Show all posts

Monday, August 11, 2008

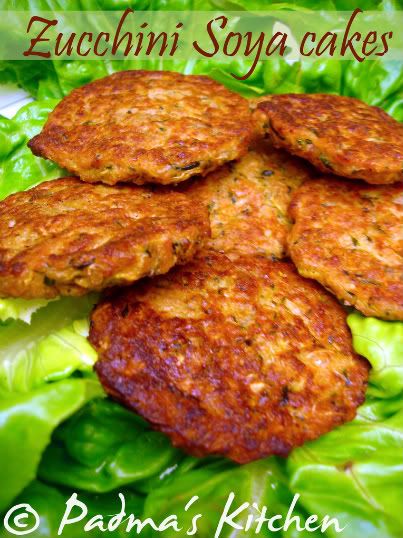
Healthy Zucchini Soya Cakes

Healthy & Tasty Zucchini and Soya cakes

Summer is here and so are the garden fresh veggies and herbs sizzling around in everyone's backyard. Well I don't have a backyard!! but can always count on endless supplies of garden fresh beauties from our local farmer's market. I believe in buying the local produce, so that you can help reducing the growing fuel use. A little effort goes a long way to curb global warming. And to top it homemade breads, pies and ice creams are a bonus to get the taste of homemade goodies.

Last week I bought some Zucchini and thought of grilling them, but instead ended up making cakes with them. When Sia of Monsoon Spice announced about JFI-Soya started by Indira of Mahanandi. I thought of making some zucchini cakes with soya chunks and soya flour for this event. JB loves to have snacks in the evening after a tiring day at work., though only few times I surprise him with some Indian fritters, snacks and salads, sad huh!

This is a very simple recipes and you can play around the ingredients pretty smoothly. I adapted this recipe from FoodTv ~ Paula Dean show. I added soya flour instead of the traditional A-P Flour (maida). Play with your veggies and you will create a fabulous snack item. Grated carrots, squash (yellow & green), green onions etc can be added too. Eat it with your favorite sauce, yogurt dip, chutney or simply with ketchup!

Cuisine: American, International
Prep time: 10 mins
Bake time: 30 mins
Makes: 8-10 cakes
Serves: 2-3
Ingredients:
1 Zucchini, grated

½ C Soya chunks, dried ones
2 T Soya Flour
2 T bread crumbs, seasoned
1 T extra virgin olive oil

1 large egg, lightly beaten
1/4 t garam masala powder or any spice mix of your choice (optional)
1/4 t cayenne pepper/chilli powder
freshly grounded black pepper
salt to taste
Oil spray

Method:
  • Grate the zucchini and drain the liquid by placing the shredded zucchini in a colander for 20 mins or place it in between two kitchen towels or papers and gently press. The extra liquid will be soaked up in the paper/towel.
  • Pre heat oven to 350 F (177 C), arrange aluminum foil on a large baking sheet and oil spray it.
  • Put the dried soya chunks in hot water, let it stand for 10 mins, squeeze the extra liquid out of it and shred them in a food processor. Shredded soya chunks it will look like ground kheema (goat/lamb meat).
  • Place shredded zucchini in a large bowl, add shredded soya, soya flour, bread crumbs, extra virgin olive oil, salt and freshly ground black pepper. Mix well and add chili powder/cayenne pepper, garam masala or any spice mix of your choice or you can opt it out completely.
  • Add lightly beaten egg and mix well shape the mixture into patty form. Place them on the baking sheet and spray once again over the patties.
  • Bake them for 30 mins turning the sides once for even cooking on both sides.
  • Serve hot with your favorite dip, chutney or sauce.

Variation:
  • If you don't have oven no worries! you can shallow fry them with little oil in a large pan just like you'd fry some ragda patties :)
  • You can add shredded carrots, cucumber, squash (yellow and green), green onions, shredded tofu/paneer (Indian cottage cheese) for variety of taste.

Saturday, July 5, 2008

Celebrating 1st Milestone, Penne with parsley pesto and zucchini

Back to Blogging!
Its been a little over 4 months I was away from blogging. My short trip to India (three and half months were not enough for me) kept me off the board, I was sad to part away from my blog but was very happy that I will be seeing my family after 3 long years. Being my first trip back home after coming to US, I was feeling very nostalgic about it from the day I booked my tickets.

Going back is always so emotional, its like you are on a journey to meet part-2 in you. Visiting the places you grew up, going to your favorite food joint, chatting up with your friends and neighbours, meeting your school teachers and recollecting the time you had with them, mother's pampering or having the road side food be it Chai, Pani puri, Chats or the famous Wada-pav... being a kid all over again makes you happy and content. I had a very nice time in India, except for the sultry summer in Mumbai, Vizag and Ongole.... we came back in mid of June and now slowly getting adjusted to the life here.

Padma's Kitchen turned 1 today!!!!!


Coming to my food blog, I am happy to announce that Padma's Kitchen turned "1" today. The journey so far has been very close to my heart. I made so many new friends around the world, who supported me, inspired me and taught me every day every way. I must not forget to say that my writing skills improved too and getting better day by day, though I may not be a good story teller. I am dedicating one of my favorite dish, I learned after coming to US... as a part of this celebration. Hope to survive blogging about food for many more years to come and make some wonderful and t@sty friends forever :)

Pasta has become more popular in my home, even my mom does cooks as evening snacks by adding Indian flavors, it really enhances the taste. I prefer Barilla plus multigrain pasta as it is a good source of protiens and ALA Omega-3. Eating pasta at least once a week has almost became a ritual in my home, JB enjoys taking for lunch. Here is one of my adapted version I grab from Giada's Everyday Italian on Foodtv. I must say that her show truly inspired me to try Italian recipes, but I envy her on the huge chunks of parmigiano-reggiano in her pantry. I wonder does she bulk order it!!


Penne with Parsley pesto and Zucchini


Ingredients:
1 C /100 g Uncooked multigrain penne pasta
1 Zucchini, sliced
1/8 t red chilli flakes
1 Shallot, chopped lengthwise
1/4 C Parmesan cheese, grated
1 T Butter
For parsley pesto
2 C Fresh flat leaf parsley, roughly chopped
1/3 C Extra virgin olive oil
2 Garlic cloves
1 t Basil
1/2 C Pine nuts, toasted
Freshly crushed black pepper
Salt as per taste
Method:
  1. Heat the one quart of water in a large pot, when it starts boiling add 1 T salt and add pasta to it. Check for the cooking instructions on the pack or if its whole wheat pasta you have to cook for 5 more mins. Check if the pasta is al dente and drain the pasta.
  2. In th time it take the pasta to cook, toast the pine nuts make sure you wont burn them. Prepare pesto by combining all the ingredients in a blender and pulse it for few seconds.
  3. Heat a tablespoon of butter add shallots to it and let it fry for a minute on a medium flame. Then add zucchini and saute it for another minute.
  4. Add the cooked penne and roughly mix it. Toss parlsey pesto and red chilli flakes with the pasta until all the flavors marry.
  5. Sprinkle some freshly grated parmesan cheese and serve hot.

I thank all my readers, friends, family members, my husband JB (who is the backbone of my blog) from the bottom of my heart for your unlimited support and valuable comments ~ inputs, boosting my confidence and making the impossible possible.....finally I am cooking ;)

I THANK YOU ALL ONCE AGAIN!

Friday, January 4, 2008

Creamy Corn Choup

Creamy Corn Choup ~ somewhere between chowder and soup

First and foremost, ( no, its not too late to say HNY...) I wish all my readers around the world a very Happy, Prosperous and Healthy New Year 2008.

Its been a very long time since I blogged, though not years! There were other things that needed my attention and my health took a toll, so blogging took a back seat. Thank you all for your concerned messages and comments, I am really overwhelmed.

As the temps are dropping more rapidly in here, I like to warm up with some soups during those wicked winterly days. Creamy corn choup is the thicker version for soup and thinner than any chowder, inspired by Rachel Ray.
Source: adapted from Rachel Ray
Cuisine: American, International
Prep time: 10 mins
Cooking time: 25 mins
Serves: 4-6 people
Ingredients:
2 T extra-virgin olive oil
4 slices turkey bacon, chopped (optional)
1 onion, chopped
4 to 5 large ears corn, scraped from cob or 1 box frozen corn
1 medium or 2 small zucchini, chopped
1 pound small potatoes, chopped
1 red bell pepper, chopped
1 bay leaf
5 to 6 sprigs fresh thyme
1 teaspoon paprika
Salt and freshly ground black pepper
3 tablespoons all-purpose flour
1 quart chicken stock
1C heavy cream
1/2 C chopped flat-leaf parsley,
A few dashes hot sauce, to taste
Salt and freshly ground black pepper
Method:
  1. Heat a medium soup pot over medium-high heat with extra-virgin olive oil.
  2. Add bacon to hot oil and cook until crisp at edges.
  3. Add onions and corn, zucchini and potatoes and bell pepper as you get them chopped.
  4. Also add to the soup pot the bay leaf, thyme sprigs, paprika, and salt and pepper, to taste.
  5. Cook for about 7 to 8 minutes to begin to soften the vegetables.
  6. Sprinkle flour into the pot, stir and cook 1 minute. Stir in the stock and let it come up to a bubble and thicken up a bit.
  7. Then stir in cream, parsley and hot sauce, to taste, and simmer 5 minutes. Season the soup with salt and pepper and serve hot with garlic bread.
Note: Leftover choup is great to taste the next day too!


Lastly, a big thank you for all my visitors for your lovely, heartfelt comments, you are my inspiration to get start over after this long blog-break!


Sunday, October 7, 2007

Amish Friendship Zucchini Bread

Amish Friendship Zucchini Bread

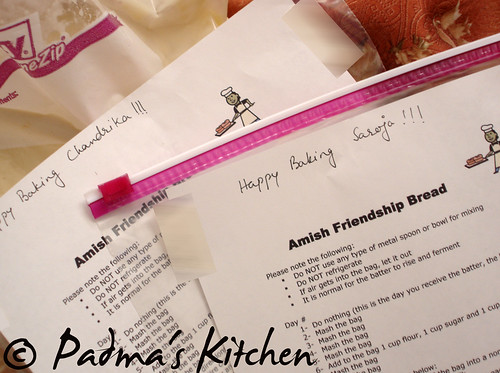
I was thrilled to open my packet of Amish Friendship Bread Starter, received from Laavanya. I quickly opened it to check the content and was little scared about the gooey-creamy like thing. This starter has to be nourished while left for fermenting for 9 days, and we bake it on the 10th day or freeze it and save for later. I received my starter on Day 3

On days 2 through 5, just mash the bag and remove excess air, if any.
On day 6 stir in 1 cup each sugar, flour and milk, mash the bag.
On days 7 through 9, mash the bag.
On day 10 stir in 1 1/2 cup each of flour, milk, sugar. Mix well and distribute 4 cups equally. Keep 1 cup of starter for myself and share the other 3 with friends.


After much research on AFBS, I came to know that cooks have been baking with starters for thousands of years. Sometime back before the ancient Egyptians, however, bakers learned that if they captured airborne wild yeast and fed and nurtured it properly, they could produce an endless array of breads, cakes, pancakes, biscuits, scones, muffins, rolls, all light and fluffy and made possible by the hard-working little fungi (yeast). Article Source: Texas Cooking

This is the first time I am trying my hands on baking bread and decided to bake a more traditional bread than something like cake/muffins/rolls/buns. This way I can teach myself to handle more of tough bakes. I brought some books on baking from local library and found this very nice and interesting recipe for Zucchini bread.

I used coarsely grated zucchini shreds which offers color and just-perceptible contrast of texture to the bread. Because it is exceptionally moist, zucchini must be salted and squeezed to rid of it excess liquid before it is mixed with the flour, starter and water. It took me two days to make this bread and learned some new techniques in baking. Like overnight standing ~ to raise and humidified baking with boiling water in the bottom to ensure crunchy bottom crust.

My first bread baking session

Zucchini Bread

Source : Breads, Time-life books
Cuisine: International

Prep time: 10 mins and left overnight to rise
Cooking time: 40 mins
Makes: 7-inch cylindrical loaf

Ingredients:
2 1/2 cups flour
1/2 cup amish friendship bread starter
2 zucchini, medium-size, washed ends trimmed off
1 tbsp salt
3/4 cup tepid/warm water
olive oil or 1 egg yolk beaten
Method:

1. Coarsely grated zucchini into a deep wide bowl. When the zucchini gratings cover the bottom of the bowl, sprinkle them with salt. Grate in another layer of zucchini and sprinkle again with salt. Repeat alternate layers if zucchini and sprinkle again with salt. Leave it for 30 mins so that the salt will draw out the excess moisture. Then press out the moisture by squeezing the zucchini in your hands.

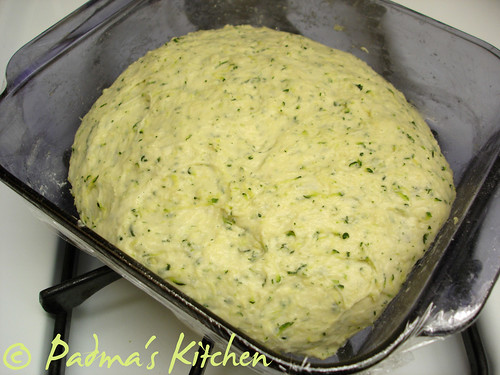
waiting to Rise!!!

2. In another bowl combine the starter, flour, salt and thoroughly mix zucchini, add enough tepid water to make a smooth but fairly firm dough. Knead the dough well for about 10 mins. Return it to the bowl, cover it with a damp cloth towel or plastic wrap and let the dough rise for about 2 hours.
Knead the dough into a loose round, then shape it into a tapered cylindrical loaf. Lay it on a buttered baking sheet, cover it with a towel and let it rise in a warm place until doubled in bulk or left overnight.

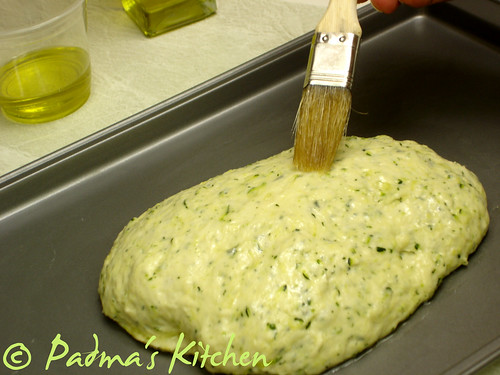
brushing olive oil to prevent zucchini from burning!


3. Just before baking, brush the loaf with olive oil or egg yolk to prevent the pieces of zucchini on the surface from burning. Preheat the oven to 425, place a roasting pan filled with 1 1/2 inch of boiling water in the bottom of your oven. Bake the bread in a humidified 425 degrees F for about 40 minutes, until the bottom sounds hollow when rapped, while checking the water in roasting pan every 10 mins. Cool the loaf on a wire rack.

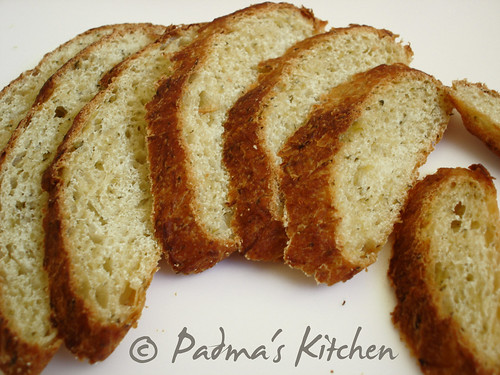
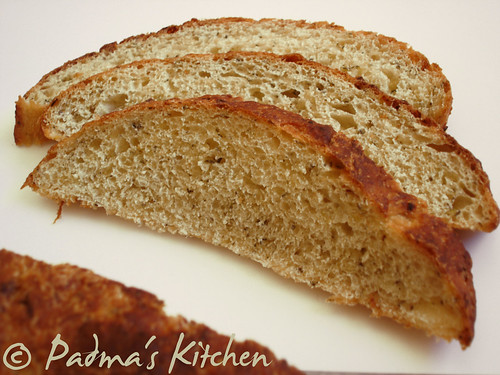
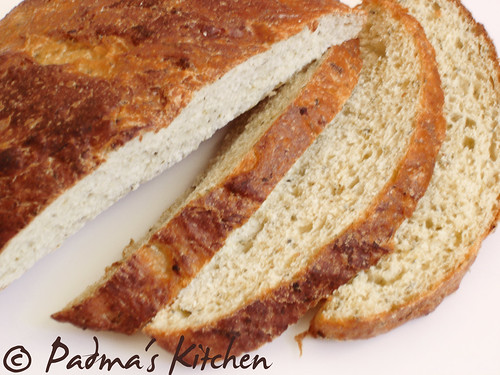
Zucchini bread slices

I am sending this starter to two of my dear friends Chandrika and Saroja to keep the tradition. Hope you guys will enjoy baking with it, as well!


starters dispatched, let me know when they arrive!


Related Posts with Thumbnails