Showing posts with label Bread. Show all posts

Sunday, August 31, 2008

Our Breakfast on a Lazy Sunday!


French toast with a glass of orange juice and fresh nectarines

Everyone has those lazy days 'quota' at least once in a while if not often, knocking at our door. Probably sleeping overtime makes us feel more lazy and specially if it is weekend without plans (no traveling) or late night sleep or watching movies. This is a day when we ought not feel to do anything. On such moments I miss India badly, if I don't feel anything to cook, i can simply go for the street food that is readily available and fills your stomach and makes you wanting more cuddling in that comfy cozy sofa.


At times I feel my feet forcefully dragging me into the kitchen and my misty eyes staring at my refrigerator and wondering what to make something in jiff and something which is filling. One breakfast recipe comes to rescue me is "French Toast" I keep going again n again and never lets me down.


The recipe goes like this:
All you need is 4 slices of whole wheat bread , a pair each for both of us. Three eggs, dash of half and half , cinnamon and few tablespoons of granulated sugar. Thats it! and the breakfast is ready.

Beat the eggs, add a dash of half and half/light cream/milk or you can skip completely if not available. Add a teaspoon of cinnamon powder and 2 tablespoons of granulated sugar. Whisk and dip the bread into this mixture and arrange it on a hot oil-sprayed frying pan or griddle. Toast the bread on both sides and your French toasts are ready.


We had our breakfast with a glass of orange juice and fresh nectarines.

Sunday, October 7, 2007

Amish Friendship Zucchini Bread

Amish Friendship Zucchini Bread

I was thrilled to open my packet of Amish Friendship Bread Starter, received from Laavanya. I quickly opened it to check the content and was little scared about the gooey-creamy like thing. This starter has to be nourished while left for fermenting for 9 days, and we bake it on the 10th day or freeze it and save for later. I received my starter on Day 3

On days 2 through 5, just mash the bag and remove excess air, if any.
On day 6 stir in 1 cup each sugar, flour and milk, mash the bag.
On days 7 through 9, mash the bag.
On day 10 stir in 1 1/2 cup each of flour, milk, sugar. Mix well and distribute 4 cups equally. Keep 1 cup of starter for myself and share the other 3 with friends.


After much research on AFBS, I came to know that cooks have been baking with starters for thousands of years. Sometime back before the ancient Egyptians, however, bakers learned that if they captured airborne wild yeast and fed and nurtured it properly, they could produce an endless array of breads, cakes, pancakes, biscuits, scones, muffins, rolls, all light and fluffy and made possible by the hard-working little fungi (yeast). Article Source: Texas Cooking

This is the first time I am trying my hands on baking bread and decided to bake a more traditional bread than something like cake/muffins/rolls/buns. This way I can teach myself to handle more of tough bakes. I brought some books on baking from local library and found this very nice and interesting recipe for Zucchini bread.

I used coarsely grated zucchini shreds which offers color and just-perceptible contrast of texture to the bread. Because it is exceptionally moist, zucchini must be salted and squeezed to rid of it excess liquid before it is mixed with the flour, starter and water. It took me two days to make this bread and learned some new techniques in baking. Like overnight standing ~ to raise and humidified baking with boiling water in the bottom to ensure crunchy bottom crust.

My first bread baking session

Zucchini Bread

Source : Breads, Time-life books
Cuisine: International

Prep time: 10 mins and left overnight to rise
Cooking time: 40 mins
Makes: 7-inch cylindrical loaf

Ingredients:
2 1/2 cups flour
1/2 cup amish friendship bread starter
2 zucchini, medium-size, washed ends trimmed off
1 tbsp salt
3/4 cup tepid/warm water
olive oil or 1 egg yolk beaten
Method:

1. Coarsely grated zucchini into a deep wide bowl. When the zucchini gratings cover the bottom of the bowl, sprinkle them with salt. Grate in another layer of zucchini and sprinkle again with salt. Repeat alternate layers if zucchini and sprinkle again with salt. Leave it for 30 mins so that the salt will draw out the excess moisture. Then press out the moisture by squeezing the zucchini in your hands.

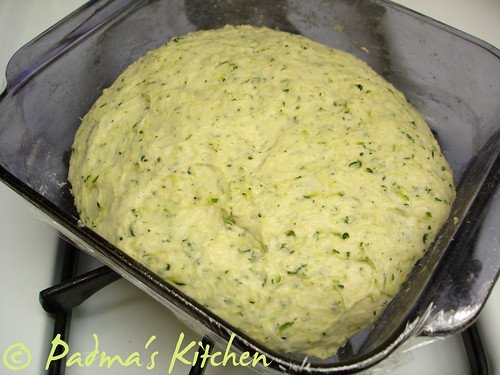
waiting to Rise!!!

2. In another bowl combine the starter, flour, salt and thoroughly mix zucchini, add enough tepid water to make a smooth but fairly firm dough. Knead the dough well for about 10 mins. Return it to the bowl, cover it with a damp cloth towel or plastic wrap and let the dough rise for about 2 hours.
Knead the dough into a loose round, then shape it into a tapered cylindrical loaf. Lay it on a buttered baking sheet, cover it with a towel and let it rise in a warm place until doubled in bulk or left overnight.

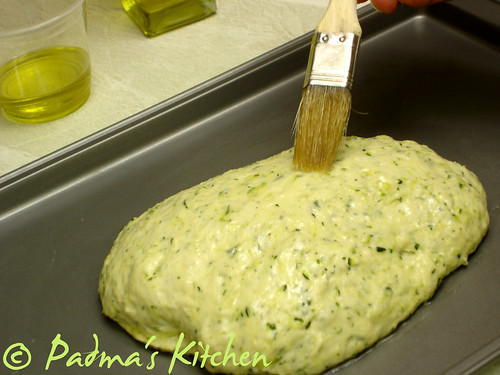
brushing olive oil to prevent zucchini from burning!


3. Just before baking, brush the loaf with olive oil or egg yolk to prevent the pieces of zucchini on the surface from burning. Preheat the oven to 425, place a roasting pan filled with 1 1/2 inch of boiling water in the bottom of your oven. Bake the bread in a humidified 425 degrees F for about 40 minutes, until the bottom sounds hollow when rapped, while checking the water in roasting pan every 10 mins. Cool the loaf on a wire rack.

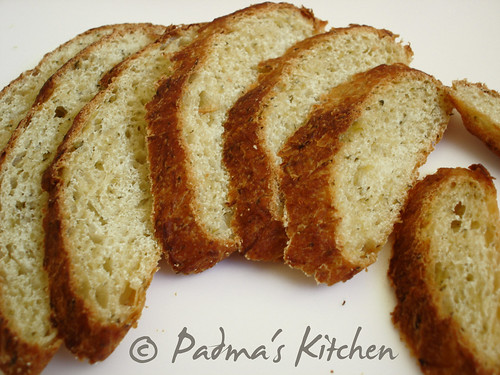
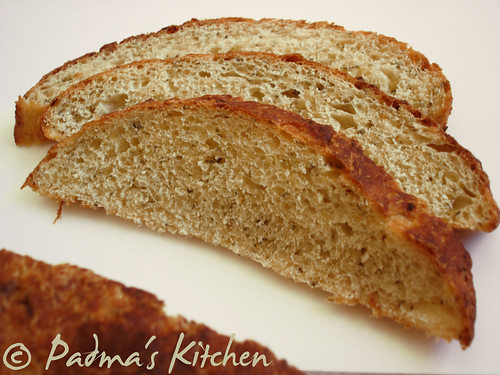
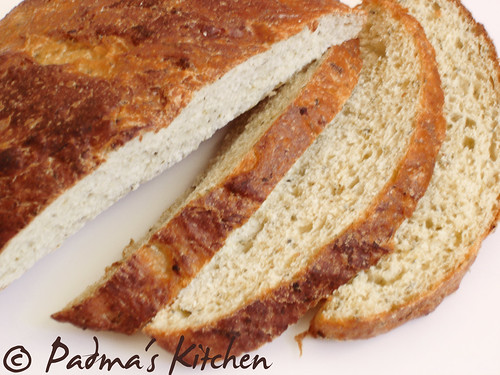
Zucchini bread slices

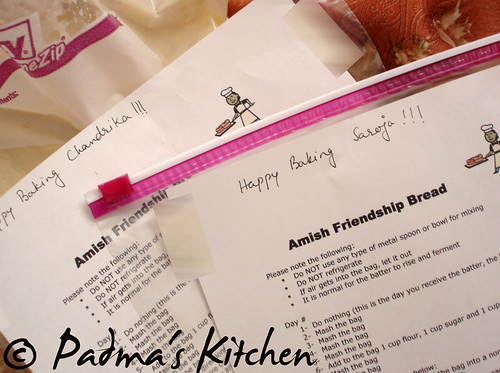
I am sending this starter to two of my dear friends Chandrika and Saroja to keep the tradition. Hope you guys will enjoy baking with it, as well!


starters dispatched, let me know when they arrive!


Friday, July 20, 2007

Tomato Basil Mozzarella and Red bell pepper Bruschetta

Bruschetta1my version of bruschetta

I love Italian food and very much in love with them apart from watching Giada De Laurentiis's 'Everyday Italian'. This bruschetta recipe is an adapted version of hers, hope you gonna enjoy trying this as we did enjoyed eating this. Very simple, elegant and easy to make recipe. If you cannot bake it in oven then you can simply toast the slices on a tava. One good thing about bruschetta is you can change the topping as per your inventory in your pantry.

I read an interesting article on the pronounciation of bruschetta where the author says "The word bruschetta is pronounced "broo-SKET-ta,' not "broo-shetta." Yet there it is, in a national television commercial being pronounced "broo-shetta," as in "Broo-shetta" Burger. (Yes, I know...)

What is so hard about calling a spade a spade, or in the case, a bruschetta? I am so frustrated with American companies perpetuating incorrect pronunciations. But even Buitoni is guilty of it, hawking their wares in the U.S.A. as made by "Byoo-toni" instead of "Bwee-toni" as it should be pronounced.

Are there bigger, more important issues in the world? Yes. Should I let it go? Sure. But this still pisses me off." If interested you can continue reading the comments made on this statement here. Bruschetta can be a good finger food, great for starters or just can accompany you for a tea-party! Also for more on bruschetta/crostini you can visit Sangita, Sharmi and Mishmash to check their versions.

Source: adapted from Giada De Laurentiis (channel FoodTV)
Cuisine: Italian
Preparation time:10 mins
Baking time: 10 mins
Serves: 5-6 people
Ingredients:
1 large French baguette or any Italian bread, sliced 1-inch thick (about 36 slices)
4-5 sprigs of fresh basil leaves, coarsely chopped
1 red bell pepper, finely chopped
2 medium sized plum tomatoes, de-seed and finely chopped
1 tsp of rosemary, fresh or dried(optional)
1/2 cup shredded mozzarella cheese
2 tbsps of extra-virgin olive oil
2 cloves of garlic, grated
freshly ground black pepper
Salt as per taste

Method:
  1. First preheat the broiler, meanwhile slice the baguette and line them up on a cookie sheet. Drizzle with some extra-virgin olive oil and sprinkle with salt and pepper.
  2. Broil the bread for a min on the upper shelf till it turns light brown, be careful not to burn the bread, remove and set the oven to 350 degrees F.
  3. In the bowl mix the basil leaves, remaining olive oil, grated garlic, rosemary, chopped tomatoes and red bell pepper and season with salt and pepper.
  4. Spread one tablespoon of the tomato mixture on each piece and top it with shredded mozzarella. Since I am not a cheese fan, i used very little cheese. But those who are cheese lovers you can replace the shredded ones with thick sliced mozzarella.
  5. Place bread back in oven and melt cheese slightly and till the aroma of basil fills your kitchen.
  6. Place bruschetta on decorative platter and serve hot.
tomato basil mozzarella red bell pepper bruschetta


bruschetta, ready to eat!


Thursday, July 12, 2007

Stuffed Egg Bread Potlis

Stuffed egg bread potlis, halved and served with ketchup

Stuffed egg bread potlis/small pouches are my new invention in finger foods, I tried them for the first time when a dear friend visited us. I wanted to make something different, unique, loaded with veggies and yet tasty for her kids. This is a quick easy, simple recipe and very entertaining because of its color. I am sure you gonna love this. I used egg batter for coating the potlis which can be easily substituted by besan (chickpea flour) batter and you need to deep fry this in oil juz like fritters or pakodas.

Source: My own
Cuisine: Indian
Prep time: 20 mins

Cooking time: 20 mins

Serves: 4-5
Ingredients
8-10 regular bread slices, trim the hard ends
2 eggs
1 cup of mixed vegetables (carrots, beans, peas,corn)
2 red beets
1 large potato, boiled
1 medium onion
2 tbs grated ginger
1 tbs lemon juice
2 tbs almonds, chopped
1 tbs green chillies,finely chopped
1/4 cup oil for frying
1/4 tsp chilli powder (cayenne)
Salt and pepper


Method:
  1. Boil in a pressure cooker the mixed vegetables and red beet.
  2. In a dish mash the boiled vegetables and boiled potato.
  3. Add chopped onions, almonds, ginger, lemon juice, green chillies, salt, pepper to the mixed vegetables and mix properly.
  4. In a separate container, beat the eggs thoroughly.
  5. Heat oil in a pan on a medium flame.
  6. Take one slice of bread and pat it with warm water to make it soft.
  7. Then take it in the cup of your left hand and add some of the vegetable mixture in the middle of the bread and close the sides of the bread.
  8. Dip this in the beaten egg mixture and fry it till golden brown, it will have french toast texture and don't worry its less oily.
  9. Serve hot with tomato ketchup.
Tips & Note: If you cannot use eggs for coating you can use besan (chickpea flour) batter, but only problem is you need to deep fry the potlis.

stuffed egg bread potlis/small pouches

Related Posts with Thumbnails