Thursday, August 7, 2008

Everything about Sourdough

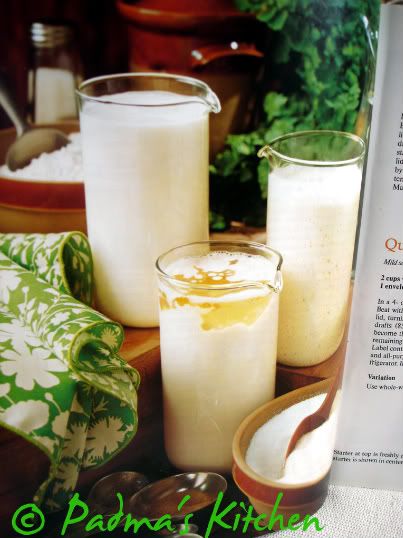
Sourdough Starter


Remember two weeks back I blogged about Cherry Rose Rolls on my blog, In my post I promised I will be posting about sourdough. These days I am hooked to Rita Davenport's 'The Sourdough Cookbook'. This book has some incredible and yummy recipes for all, from breads, rolls, twists, biscuits, muffins to pancakes, waffles, cakes, cookies & brownies and main dishes too! Awesome, isn't it? I am drafting some of the goodies from her book in my blog.

The story of Sourdough
For centuries, sourdough was a mystery. According to one historical account, sourdough was discovered in the days of the Egyptian Pharaohs, about 5,000 years ago. An Egyptian noticed that some flour he left in an uncovered container had become wet and bubbles had formed in the mixture of flour and water. Not wanting to waste the dough, the Egyptian used it to make bread dough. The bread baked from this mysterious dough had a light texture and a tantalizing flavor.

Today we know that moisture, wild airborne yeast and possibly some lactic acid bacteria fell into the open container of flour, causing fermentation. Yeast is a
plant fungi that ferments certain kinds of sugars in flour and produces carbon dioxide. This expands the dough in baked products, making them light and porous.

Although sourdough is a heritage from our past, it's an enjoyable part in our lifestyle today. Sourdough is natural. Homemade sourdough products contain few or no preservatives. They are inexpensive source of vegetable protein, carbohydrates, important minerals and B vitamins.

Baking with Sourdough
The basic ingredients in many sourdough recipes are sourdough starter, flour, liquid, sugar, eggs, fat and salt. Use the best available ingredients. The finished product is only as good as the ingredients that go into it.

Sourdough Starter can be obtained by mixing the ingredients together yourself or by obtaining a cup of starter from someone else. The older the starter, the more tangy flavor. Because of variations in flour, water composition and local atmospheric conditions, you may find one starter recipe works better for you than another.

Flour is the major ingredient in most of sourdough recipes. All-purpose or whole-wheat flours are used in all recipes. Rye flour is used in combination with wheat flour in some breads. Stir flour gently before measuring it to eliminate the need of sifting.

Milk, water or fruit juices are used in most sourdough recipes.

Sugar and other sweeteners provide flavor, color and texture in baked foods. Each sweetener has a delicate but distinctive flavor. Sugar blends well with the flavors of other ingredients. Honey and molasses are used as substitutes in several breads and cookies.

Butter, margarine, shortening or oil are used to tenderize baked products and to enhance the flavors of other ingredients.

Temperature is an important factor in the success of a sourdough recipe. Sourdough must ferment and rise at a temperature close to 85F (30C).

Mix sourdough recipes in glass, stoneware or plastic bowls using wooden or plastic spoons. Any prolonged contact with metal will change the flavor. Store sourdough starter in a stoneware, glass or plastic container. The container should be large enough to allow for expansion of the starter to twice its original size. Be sure there is a small hole in the top of the container or the lid is ajar to let accumulated gas escape and for yeast to get air.

If the mixture turns pink or orange, or if the starter is not replenished every seven to ten days, it may spoil; d
iscard it immediately and start over. Don't discard the starter just because its age, merely replenish it. Occasionally pour all of the sourdough starter into a mixing bowl. Wash the storage container to remove flour buildup. If you are not using the starter for a while, it can be store in the freezer up to three months.
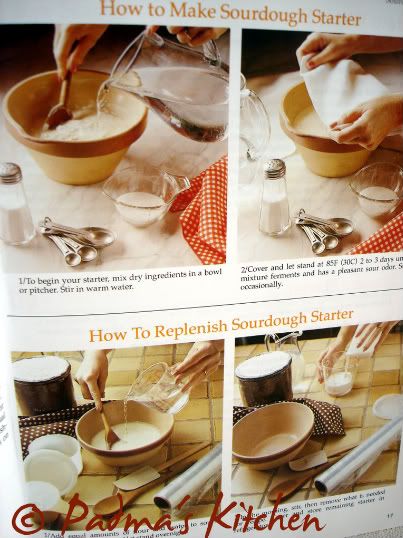
How to make sourdough


For Basic Sourdough Starter
Use this starter in most of the recipes which calls for sourdough

Ingredients:
2 C all-purpose flour
3 T sugar
1 envelope active dry yeast(1 T)
1/2 t salt, if desired
2 C warm water
Method:
  • In a 4 or 6 cup or plastic pitcher or in a large bowl, combine all ingredients. Beat with a wooden or plastic spoon. Fermentation will dissolve small lumps.
  • Cover pitcher or bowl with lid. Cover bowl with a cloth. Set in a warm place free from drafts (85F, 30C). Let it ferment 2 to 3 days. Stir mixture several times each day.
  • To use, remove starter needed for recipe. Refrigerate remaining starter in pitcher or in a plastic container with a lid that has an air vent or hole in it. Label container with contents.
  • Replenish every 7 to 10 days by stirring in equal amounts of water and all-purpose flour. After replenishing, let stand at room temperature overnight. Return to refrigerator. If a clear liquid forms on top, stir back into starter.
  • Makes 3 to 4 cups.
Quick Overnight Starter
Mild sourdough flavor in a hurry. Double the recipe if you plan to do lots of baking.


Ingredients:

2 C warm water (105F, 40C)

1 envelope active dry yeast (1 T)

2 C all-purpose flour

Method:
  • In a 4 or 6 cup plastic pitcher or in a large bowl, combine all ingredients. Beat with a wooden or plastic spoon. Fermentation will dissolve small lumps.
  • Cover pitcher or bowl with lid. Cover bowl with a cloth. Set in a warm place free from drafts (85F, 30C). Let stand 6 hours or overnight. Starter will ferment, increase in size, then become thin and decrease to original size.
  • To use, remove starter needed for recipe. Refrigerate remaining starter in pitcher or in a plastic container with a lid that has an air vent or hole in it. Label container with contents.
  • Replenish every 7 to 10 days by stirring in equal amounts of water and all-purpose flour. After replenishing, let stand at room temperature overnight. Return to refrigerator. If a clear liquid forms on top, stir back into starter.
  • Makes about 3-1/2 cups.
Variation: You can use whole-wheat flour in place of all-purpose flour.

Causes for Inferior Bread
  • Poor texture or colour, low volume or heaviness ~ Inferior flour, oven temperature too low, over rising, milk not scalded.
  • Coarse texture or dry crumb ~ Too much flour, under-kneading, over-rising, milk not scalded.
  • Undesirable flavour ~ Over-rising, inferior yeast or flour, too high temperature while rising, oven temperature too low, under-baked.
  • Bread won't rise ~ Weak or inactive yeast, dissolving yeast in water that is too hot.
  • Streaks through loaf ~ Poor mixing, under-kneading, too much flour on board, top of dough drying before shaping, using greased hands to shape loaves.
  • Uneven shape ~ Too much dough for pan, improper molding or shaping, over-rising before baking, rising in a draft, pans touch in oven.
  • Flat loaf that browns too quickly ~ Yeast killed with hot water, under-rising of loaf, over-rising of loaf which falls in center before completely baked.
  • Porous bread with pale crumbling crust ~ Over-rising, too much flour, dough too stiff.
  • Thick crust ~ Over-rising, under-kneading, oven temperature too low.
  • Cracks in sides or top of crust ~ Dough too stiff, under-kneading, uneven heat in baking, too rapid cooling in draft.
  • Tough crust ~ Inferior flour, too much salt, too much handling, needs more shortening.
  • Pale crust ~ Too little sugar, too much salt, drying of dough during rising, oven heat too low.
  • Bulging crust ~ Under-kneading, dough not punched down before shaping, loaf molded without removing gas bubbles, over-rising.
Storing Sourdough Baked Goods : The absence of chemical preservatives and the presence of healthy, active yeast in sourdough call for special storing.
  • Sourdough products will keep for two or three days at room temperature in bread boxes or other containers that retard drying. Wrap baked goods securely in plastic wrap or foil.
  • To keep baked items for several days, wrap them well and refrigerate them.
  • Sourdough baked goods can be frozen up to three months.
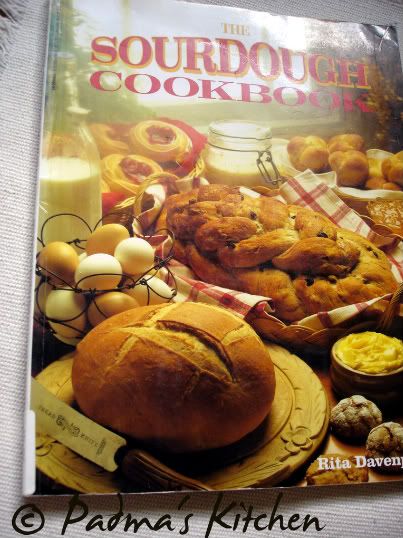
photo source: taken from "The Sourdough Cookbook"
by Rita Davenport

All recipes in this book calls for using sourdough starter, the recipe is given below which has two variations, one which sits for 7-8 days and other is an overnight quick recipe for sourdough starter. There are many more recipes we can make out of this starter. Its up to you to explore. I will post few which I tried out.

I hope you all must not be intimidated to try some baking with Sourdough starter, but I can assure you that its pretty easy to start. Hope my post inspires you to start baking some breads, rolls and many more goodies from sourdough starter.


Thursday, July 31, 2008

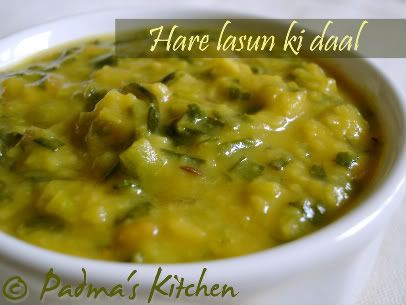
Hare lasun ki dal ~ Green Garlic Daal

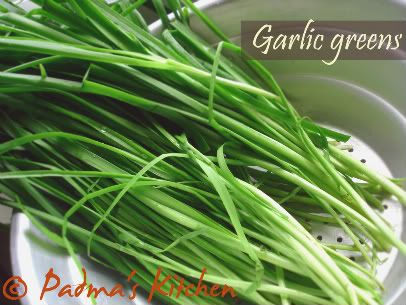
Fresh green garlic from farm market


"How can we use them in cooking, where can I find recipes using these greens". I always talk to myself when I see them at my local farm marker. Yes, I am talking about green garlic.

Green Garlic is a spring culinary treat that does not receive as much fan fare as it deserves. This mild stage of garlic may be hard to find unless your have access to a farmers market that sells this delicacy (from March to July) or you garden and grow your own. If you are going to purchase green garlic look for green stalks that are not yellowing or blemished.

Prepare - Similar to leeks, green garlic stalks trap dirt and sand within the leaves. Rinse each stalk carefully. Once washed, the entire stalk can be used.

Store - If you are growing the garlic then harvest right before you use it. Green garlic can be stored in the refrigerator for up to three or four days. One stalk of green garlic is equivalent to one or two cloves of garlic.

I got hold of a bunch from my local farm market and used in the preparation of this dazzling dal. I used half the bunch of garlic greens for this recipe as the green garlic flavor is very overpowering.

Green Garlic Daal

Source : My own
Cuisine: South Indian Fusion
Prep time: 7 mins
Cooking time: 20 mins
Serves: 4 people
Ingredients:
1 C toor daal/ split-redgram lentil, uncooked
1 C or 10-12 sprigs of green garlic, chopped roughly
1 shallot, chopped
1 medium tomato, chopped finely
1/2 t turmeric powder/haldi/pasupu
1/2 t cayenne pepper/mirchi powder/red chillie powder
1 t cumin/jeera
1/2 t oil
salt as per taste
2 C water
for tempering/tadka/poppu:
1 tsp mustard seeds
1 tsp urad dal/black gram lentil
5-6 curry leaves
a pinch of hing/asafeotida
1 T any cooking oil

Method:
  • Wash and soak dal for 30 minutes. Add one cup dal with half spoon of turmeric powder, cumin/jeera and half spoon of oil. with 2 cups of water, pressure cook for 4-5 whistles. Adding oil to dal will cook evenly and mash perfectly, cumin/jeera gives flavor to dal and turmeric gives the color.
  • Once the dal is cooked cool down add salt to it and mash dal with a masher or traditional pappu gidda.
  • If you do not have a pressure cooker, boil it in a large pot with two and half cups of water till the lentil is little overcooked.
  • While dal is cooking chop garlic greens, shallots and tomatoes.
  • In a kadai or small pot heat a tablespoon of cooking oil, add mustard seeds, let it splutter then add urad dal/black gram lentil, curry leaves and hing/asafeotida fry for a minute.
  • Add chopped onions and let them fry for another minute or till they turn transparent. Once you know that onions are cooked add finely chopped tomato and cook till the tomatoes looks mushy mushy and starts to leave oil from its sides.
  • Add cayenne pepper/red chilli powder and chopped green garlic. Cook for a minute or two.
  • Pour the entire mashed dal, stir well and let it simmer for 2 more minutes and you are done. Check for salt
  • Serve hot or cold with rice, rotis/phulkas/Indian flat bread.
While you start to chop garlic greens you will notice that the aroma fills the room already! Reduce the quantity of garlic greens if you are not a garlic lover. I used 1/2 a bunch around 10-12 sprigs.

More dals from my kitchen:
Baby Bok-Choy Pappu
Udipi Sambhar
Pedamma's Pappu charu


Sending this to Weekend Herb Blogging Kelly from Sounding My Barbaric Gulp a herb blogging phenomenon started by Kalyn of Kalyn's Kitchen. The new rules are in effect to this event, please check her blog for more details.

Wednesday, July 30, 2008

Egg Muffins with Feta, Basil and Green onions

Egg Muffins with Feta, Basil and green onions

Egg Muffins, or more simpler called as mini egg cakes are great for breakfast and brunch. JB always loves this and insists on egg muffins over plain omelette for our Sunday breakfast. He is more happy if I don't use oil in it, innocently satisfied that it is fat free (from oil at least!)

I was hooked ever since I saw them at Kalyn's Kitchen. Man she has some of the awesome varieties in her blog with great choice of veggies that can go in. I suggest you do take some time and check in those muffins. I wanted to blog this post much before, it was sitting in my drafts for more than four months now. The ingredients used in this are simple and easy to find like basil, green onions, your choice of cheese and milk. You can play with the ingredients by adding mushrooms, carrots, broccoli, red peppers, asparagus, cooked meat like turkey, chicken etc.

Source: adapted from Kalyn's Kitchen
Cuisine: American, International
Prep time: 5 mins
Bake time: 20 mins
Makes: 2 people
Ingredients:
4 eggs
2 T whole milk
1/3 C feta cheese (goat cheese),crumbled
2 T fresh basil, chopped
1 bunch green onions, chopped
1/2 t garam masala powder or any spice mix of your choice
1/2 t cayenne pepper/chilli powder
freshly grounded black pepper
salt to taste
oil to spray the muffin tray
Method:
  • Preheat oven to 375 degrees F/185 degrees C and oil spray the muffin tray.
  • Crack the eggs in a bowl, beat it so that the yolks are mixed well with the egg whites.
  • Add milk, garam masala, freshly ground black pepper, cayenne pepper and salt and stir well.
  • Add the green onions, basil and feta cheese. Mix well and pour in the muffin tray, I filled it half only but you can go ahead and fill fully. So that muffins will be fluffy and bigger in size. Mine was dwarfish :(
  • Bake for 25-30 minutes until slightly browned and cooked.
  • Makes 8-9 small muffins. Serve hot with your favorite bread or simply eat with tomato ketchup.
The feta cheese flavor burst like butter in your mouth. For healthy option try with egg beaters or only egg whites. These freeze well, so you can freeze it for later use, if you have excess. Store it in ziploc bag and for best results, thaw it in refrigerator before microwaving it. Wrap in a paper towel while reheating it in microwave as sometimes they release liquid. For more tips visit Kalyn's Kitchen.

More Egg recipes from my blog:
Stuffed Egg bread potlis
Brunch-O-melette

Monday, July 28, 2008

Alasandalu kura ~ Black-eyed peas curry


Alasandalu kura ~ Black-eyed peas curry

Alasandalu ~ Black-eyed peas or cow peas in English, also known as Bobbarlu in Telugu, Karamani in Tamil, Lobia in Hindi, Chavli in Marathi and Alasande in Kannada. Cow peas are a good source of Calcium, Folate and Vitamin A apart from protein and fiber, hence it is very useful to kids and, pregnant women also.


Preparation, uses, and tips:
Before cooking dried peas, soak them for four hours, then pressure cook for ten minutes, or simmer on the stove for one hour or till tender. 1 cup dried black-eyed peas yields approximately 2 1/2 cups of cooked peas. Cooked black-eyed peas can be puréed into a delicious spread for sandwiches or crackers. There are varieties of dishes in India, made by using black-eyed peas as main ingredient. One such simple recipe is the curry which goes well with any bread, rice and nans, phulkas, rotis/indian flat bread. For more on the nutritional value of black-eyed peas click
here

Alasandalu Kura

Source: Myself
Cuisine: South Indian, Andhra
Prep time: 7 mins
Cooking time: 20 mins
Soaking time: 4 hrs or overnight
Makes: 4-5 people
Ingredients:
1 C alasandalu/black-eyed peas,raw
2 C water for boiling the peas

1 medium onion white or red, finely chopped
1 large tomato, finely chopped
2 green chillies, halve them n chop finely
3-4 cloves of garlic, finely chopped

1 T tamarind pulp/chintapandu pulupu
6-7 curry leaves
1 T fresh cilantro, chopped
1 T cayenne pepper, chilli powder (adjust accordingly)
a pinch of turmeric powder
1 t each of cumin/jeera and mustard/rai seeds
1T any cooking oil
salt as per taste
1/2 C water

Method:

  • Soak alasandalu/black-eyed peas overnight or minimum for four hours. Wash them thoroughly and pressure cook them with two cups of water and a pinch of salt. Drain and keep aside.
  • In a large pot or kadai, heat oil and add the seasoning: cumin and mustard seeds. Let it fry for a min and then add curry leaves and chopped garlic. Fry till the aroma of garlic fills the room.
  • Add onions and salt to sweat them. Fry till the onions are translucent or turn pink for about 3 mins then add chopped tomatoes, green chillies and let them cook for 6-7 mins or till the tomatoes turn mushy mushy and starts to leave the oil. Lastly add the cooked black eyes peas/ alasandalu and stir well till as the ingredients are mixed well.
  • Add turmeric and chilli powder and tamarind pulp/chintapandu pulupu to it. Check for salt, add half cup water and let it simmer on low flame till all flavors blend well.
  • Garnish with cilantro and serve with rice or rotis/indian flat bread or any bread. We had ours with Jonna rotti~ Bhakri
I am sending this to Cooking 4 all seasons for Curry Mela hosted by Srivalli. Hope this qualifies!

O
ther peas/beans curries from my kitchen:

Chole
Avarekaalu Usli

Through my lens ~ Coffee Stains

"Through my lens" is a new series of food photography. An idea to portray beautiful things I indulge in every day life and share the moments with my friends and visitors to this blog. This series primarily focus on food and things related to it (food). Today I tried to click coffee stained paper through my lens.


The above picture goes to Click July 2008. This month's theme is Coffee and Tea.

Materials used: Coffee Mug, coffee stained paper towel, brown textured paper used in background to compliment coffee stains.
Camera: Sony Cybershot DSCP100.
About photo: taken in bright sunlight beaming from window and without flash.
Nicks & Knacks: adjusted the brightness and contrast.


"The coffee stains clicked here is not wasted intently for the snap, but indeed was spilled by mistake when my hand hit the coffee mug in my refrigerator. I wanted to make a cold coffee but nevertheless I ended up clicking the dried out paper towel instead for this event ;)"


Related Posts with Thumbnails