Monday, December 15, 2008

Blogging out Hunger~We Can't Let This Bank Fail!

Bloggers unite to Fight Hunger in New Jersey

My dear friend Deb of Jersey Bites invited me to join in this campaign she is coordinating on behalf of the Community FoodBank of New Jersey — the largest food bank in the state. As you are probably well aware, the Food Bank is in desperate need of donations this holiday season. With bare shelves and demand for food among state residents far out pacing supply, the FoodBank is in danger of being unable to meet the needs of New Jersey’s hungry.

More than 35 million Americans, including 12 million children, either live with or are on the verge of hunger.


One out of every five New Jersey families does not earn enough to afford the basic necessities – housing, food and child care – although 85 percent of these households have at least one family member who is working.

In New Jersey alone, an estimated 250,000 clients will be seeking sustenance this year from the state's food banks. But recently, as requests for food assistance have risen, food donations are on the decline, leaving food bank shelves almost empty and hungry families waiting for something to eat.


The situation is dire, no more so than at the Community FoodBank of New Jersey (CFBNJ), the largest food bank in the state, where requests for food have gone up 30 percent, but donations are down by 25 percent. Warehouse shelves that are typically stocked with food are bare and supplies have gotten so low that, for the first time in its 25 year history, the food bank is developing a rationing mechanism.

As the state's key distributor of food to local banks – serving more than 500,000 people a year and providing assistance to nearly 1,700 non-profits in the state – the stability of replenishment of the CFBNJ is essential to ensuring that individuals in need have access to food.

To really understand the serious need for donations, just click on the link below and take a minute to view the video.


If everyone could just do a little, it would help those in need a lot. To help, people can:

  • Make a monetary contribution: Visit www.njfoodbank.org
  • Donate food: Drop off a bag of food at your local food pantry.
  • Organize a food drive: We can help explain the logistics of starting a food drive. Just call 908-355-FOOD.
  • Help "Check Out Hunger:" Look for the "Check Out Hunger" coupons at your local supermarket and donate. No donation is too small!
  • Please look for the $1, $3, & $5 donation slips at A&P, Food Basics, Foodtown, Genuardi’s, Kings, Pathmark, ShopRite, Super Fresh and Wegmans. 100% of your generous donation in the stores or at http://www.checkouthungernj.org/ will come back to the FoodBank and make a real difference in the COH_Tickets_giffight against hunger in New Jersey.
Over 100 bloggers have united to fight hunger across the Garden State. Together we can fight against 'HUNGER'.

We’re hoping our efforts will compel everyone to do something, anything, to help.
Monday, November 17, 2008

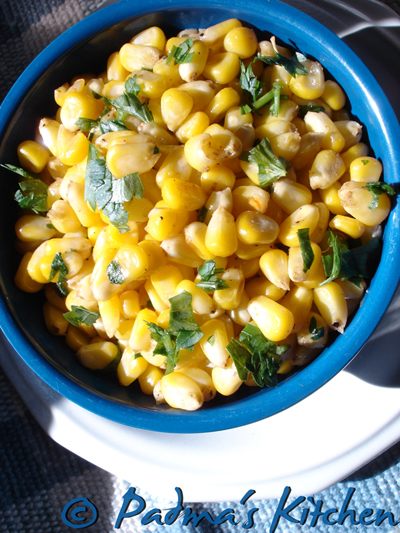
American Butter Corn

Its been a long time I am updating my blog. We/I took a break and life was pretty busy, moving to a new apartment and settling down took us two tiresome weeks. Excited about our new apartment, it has a balcony.... and can't wait for Summer!!

Any one who recently visited India will know about this famous theater snack which is so popular amongst all the ages. Yes, I am talking about American Butter Corn. is famous in most of the movie theaters all across India especially in Andhra Pradesh. Some how I managed to bring that taste here, I make this for prasadam/offering to Saibaba. This recipe has less fat from one tbsp butter, It is a good source of fiber as we make from fresh corn and here goes the simple recipe.


American Butter Corn
Recipe Source: My Own
Cuisine: Global
Preparation time: 10 minutes
Cooking time: 10 minutes
Makes: 4-5 people

Ingredients:
3-4 fresh sweet corn
2 tbsp fresh parsley, chopped
freshly ground black pepper
1 tsp red chilli powder
1 tbsp butter
salt as per your taste
4 cups of water

Method:
  • Bring 4 cups of water to boil, to this add salt. Break fresh corn into two or three pieces and boil the cobs for 10 mins.
  • Peel corn from the cob.
  • Take a saute pan, heat it on medium high, add butter to that. Now add corn, freshly ground black pepper, pinch of salt and chilli powder.
  • Mix well so that excess water is evaporated, at the end mix in some chopped parsley or cilantro. You can play with the flavours here by adding different kinds of herbs and spices.

Monday, October 27, 2008

Wish you a Happy Diwali


Hope this Diwali fills your year with joy and continues to brighten the rest of your life


I wish all my friends, my readers a very
Happy Diwali.


Festival Food ~ Chivda

festival food ~ Chivda
Its been a long time I was away from blogging. There were few things to attend first and blogging took a back seat. Diwali is here so I took this opportunity to write a post related to Festival Food. Festivals are always celebrated with much zeal, pomp and show in Bombay. During Diwali when you step into that multi-storied apartments you can smell, shankarpala, karanji, chakali, ladoo etc etc from everyone's kitchen.

'Faraal' ~ Festival food as is called in Marathi is made with so much of love and passion and distributed to our friends and relatives on the day after Diwali. All the three of us used to help my mother in the preps of these fabulous Faraal and some times used to eat the raw dough made for
Shankarpala.

Chivda is a traditional Maharashtrian snack made for Diwali and is called by many different names across India. Chivda is a combination of toasted rice flakes, roasted peanuts, cashews, dalia and any of your favourite ingredients. In general it is a mixture of so many different flavours and definitely reflects the diversity of cultures in India, now here is the recipe. Chivda tastes good if you make it with thin poha.

Chivda
Recipe Source: My Mother
Cuisine: Maharashtrian Cuisine ~ Indian
Preparation time: 10 minutes
Cooking time: 30 minutes
Makes: 20-25 people

Ingredients:
10 Cups thin rice flakes, thin poha/atukullu
¾ cup peanuts/chanakayalu
¾ cup dalia/ chutney dal/putnalu
¾ cup cashewnuts/kaju/jeedipappu
½ cup raisins/khishmish
¼ cup curry leaves/kadipatta/karvepaku
¼ dried coconut flakes/ sukha khobra/endu kobbari
3 tbsp toasted fennel seeds/badi sop
1 tsp red chilli powder/karam
2 tsp turmeric/haldi/pasupu
4-5 tsps sugar
2 tsps salt as per your taste
5 tbsp cooking oil

Method:
  • Sift thin poha in batches to remove any powdered flakes, otherwise it may result in powdered Chivda. It is always good to sift them through bigger filter to get rid of small powered poha flakes.
  • I fry them batch wise in a large kadai. Heat 2 tbsp of cooking oil, add 1 tsp of turmeric and immediately add 5 cups of rice flakes/poha. Start stirring so that all the poha flakes are evenly covered with oil and turmeric. Fry them on medium flame and make sure not to burn poha by constantly stirring and folding the poha flakes.
  • Remove once they are done and repeat the same steps for the second batch. Place them in a big mixing bowl or on a large sheet of paper.
  • Now fry individually in a teaspoon of oil roast cashew nuts, peanuts, dalia and curry leaves. Pour them over the fried poha flakes.
  • Dry toast coconut flakes and fennel seeds and add it to fried poha flakes.
  • Lastly add raisins/ kishmish, red chilli powder, salt and sugar and mix them properly with the other ingredients and fried poha flakes, check for salt and sugar. Take special care not to break the poha, when you mix it. You have to handle them delicately.
  • Box it in an air-tight container and Chivda is ready to serve/ share.

I cannot end this post without mentioning about the recent loss of our dearest family member, my brother-in-law on 7th Oct 2008. This dedication goes to him as he loves Chivda so much.

"There will always be the presence of his absence and it can never be filled"
May his soul rest in peace, Amen!

Monday, October 6, 2008

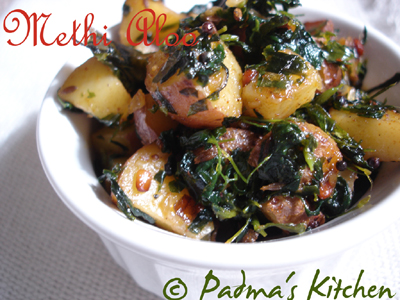
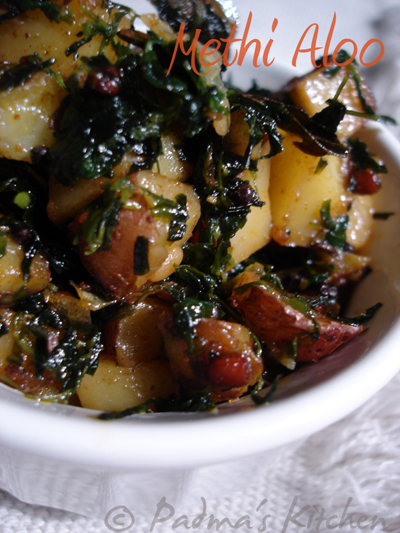
Methi Aloo

Did I tell you that Potatoes are my favourite roots of all. I love to have them with almost anything. As it is known to all that potatoes are rich in starch and carbohydrates and many are watching their carb consumption. I must say they are even keeping me away from blogging, no I was just kidding! But I agree that they make me dozzZzy Zzzz Zzzz ZZz!!!

Frying potatoes with methi leaves for me is a Maharashtrian cuisine. I do know that Methi Aloo might be some north-indian cuisine too. I always like this with hot steamed rice and dal or chapatis. Methi leaves used here in this recipe are picked straight from my window garden. I will update my garden photos shortly.

My window garden, Fenugreek/Methi


Medicinal information on Fenugreek leaves
Use a lot of fenugreek (methi) in your culinary preparations. Why? For the simple reason that it is so healthy. This wonder herb, a very popular vegetable in the Indian cuisine is a nature’s boon to mankind. Besides, it is so appetizing, light and dry. Rich in protein, calcium, phosphorus and iron in their natural forms, its mineral and vitamin contents are also very high and this is easily assimilated by our body. This is extracted from beauty and personal grooming. For more on information on Methi leaves, its medicinal benefits and home remedies do check the informational blog here beauty....


Methi Aloo

Recipe Source: Friend

Cuisine: Maharashtrian Cuisine ~ Indian
Preparation time: 20 minutes
Cooking time: 30 minutes

Ingredients:
6-7 red skin potatoes, diced and cubed into small pieces
1 small bunch of
fenugreek leaves/methi leaves/menthaaku
1 tsp red chilli powder/cayenne powder/karam
a pinch of turmeric/haldi/pasupu
for tempering/seasoning:
2 tbsp cooking oil
1 tsp cumin/jeera/jeelakara
1 tsp mustard/rai/avaalu
1 tsp black gram/urad/minapappu
5-6 curry leaves

Method:

  • Clean and roughly chop the methi leaves/fenugreek leaves.
  • Heat oil in a frying pan or kadai. Add all the seasoning ingredients. Fry for a minute and then add the diced and cubed red potatoes with its skin on.
  • Fry for 15-17 minutes or till the potatoes are cooked. Sprinkle some salt, turmeric and cayenne pepper/karam and stir so that all the spices are mixed well.
  • Lastly add fenugreek leaves/methi leaves, let it cook for 3-4 mins and stir so that leaves are mixed well.
  • Serve it with hot steamed rice or rotis/Indian flatbread.
I am sending this to Susan of The Well Seasoned Cook, Weekend Herb Blogging is brainchild of Kalyn from Kalyn's Kitchen. Do not forget to check the new rules on weekend herb blogging

More tasty Aloo(potato) recipes from my blog:
Jeera Aloo
Punjabi Gobi Aloo muttar

Tuesday, September 23, 2008

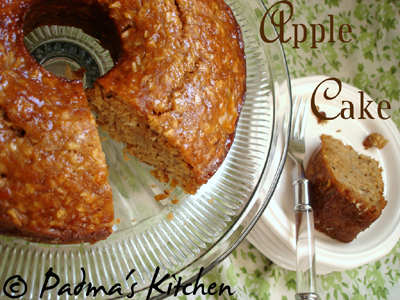
My favourite Apple Cake!!!

There is nothing more soothing than the aroma of
freshly baked apple cake with cinnamon!!

Fall has arrived and so does the season of Apples arrive. I first tasted this Apple cake at one of my friends baby shower. As a foodie you know, without much hesitation I asked my friend the recipe for the fabulous cake. Since then I have been baking this cake for more than 3 years now. This recipe is for a keepsake, tried and tested for sure! Coz it won't betray you nor abandon you.

I baked and gifted this cake to most of my friends and they can verdict about its taste and texture. I often bake them with Gala Apples when I don;t get hold of Green Granny Smith Apples. I sometimes bake it in a tube pan, sometimes in a bundt pan, sometimes in round and sometimes in a rectangle pan. It is totally up to you! So I can say this is such a versatile recipe and can accommodate in any kitchen.

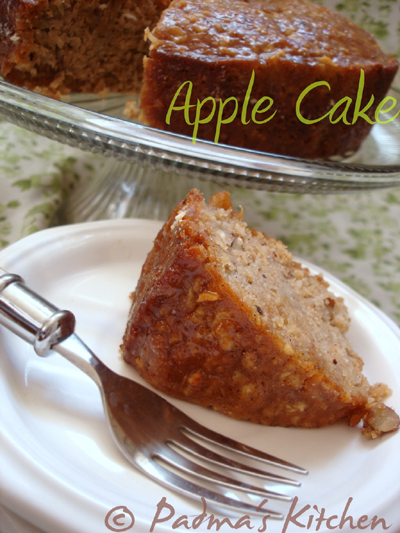
here is my slice of cake!


Apple Cake

Recipe Source: Friend

Cuisine: International Cuisine ~ American
Preparation time: 25 minutes
Cooking time: 50 - 80 minutes

Ingredients:
For Cake:
Butter, for greasing pan
3 cups all-purpose flour
2 cups sugar (you can reduce to 1½ cup)
1 tsp baking soda
¼ tsp salt
1 tbsp cinnamon powder (I use 1 tsp)
3 eggs
1½ cups vegetable oil
¼ cup orange juice
1 tbsp vanilla extract
3 cups Apples, cored, peeled and finely chopped (pref. Granny Smith apples)
1 cup shredded coconut
1 cup chopped almonds (any nuts)
For Sauce:
½ cup (1 stick) butter
1 cup sugar (you can reduce to ¾ cup)
½ cup buttermilk
½ teaspoon baking soda

Method:
  • Preheat the oven to 325°F[165°C]. Generously grease a tube pan.
  • For cake: In a large bowl, combine sugar, eggs, oil, orange juice, flour, baking soda, salt, cinnamon and vanilla extract; and mix well.
  • Fold apples, coconut, and pecans into batter.
  • I used a Bundt cake pan and a normal round cake pan for baking this cake.
  • Pour the batter into the prepared pan and bake until a tester comes out clean, about 1½ hours.
  • Shortly before the cake is done, make the sauce.
  • For Sauce: Make sauce in a deep pan else it will overflow when it starts boiling.
  • Melt the butter in a large saucepan, stir in sugar, buttermilk, and baking soda, and bring to a good rolling boil, stirring constantly.
  • Boil for 1 minute. Pour the sauce over hot cake as soon as you remove it from oven.
  • Let stand 1 hour, then turn out onto a rack to cool completely.Cut into pieces and serve. It tastes better when served cold.
  • I bake my cake a little longer to get a nice, yummy crust. I love it that way!

Sending this photo to Click-Sep 2008

Wednesday, September 17, 2008

Through My Lens ~ Few guessed it right


Through my lens ~ guess......

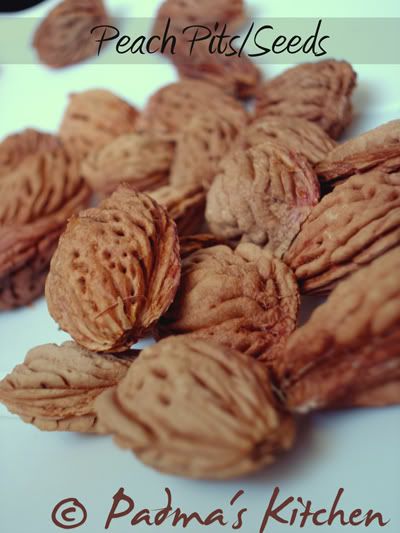
Remember I asked 10 days back about the photo I posted in Through my lens ~ Guess! Yeah.... those are peach pits/seeds! Many thought they were Walnuts, Almonds, Akhrot etc etc...

Only Aparna, Sia and Rachel were able to guess it correctly! Now here is a close up look at these Peach Pits.


Peach Pits

Coming soon Peach Jam, stay tuned!!!


Wednesday, September 10, 2008

Chicken 65 ~ Indian Chicken Nuggets

Chicken 65 is one of my favourite comfort food when it comes to non vegetarian. I learned it from my cousin sister. Both my cousins cook wonderful, delicious and mouth watering non vegetarian (mostly chicken, fish, seafood and goat or lamb) dishes. Gosh! I have so much to learn from them.
So here goes the recipe for this mouth watering Chicken Appetizer.

Please don't ask me why it is called Chicken 65? not that I made exactly 65 pieces of chicken. Vague, isn't it? I will let you all know once I find it out.


Chicken 65 ~ Indian Chicken Nuggets

Recipe Source: Satya Akka

Cuisine: South Indian Cuisine ~ Andhra
Preparation time: 25 minutes
Cooking time: 30 minutes

Ingredients:
3 pounds (1.4 kgs) tender chicken breasts
boneless, skinless and cubed into 1 inch pieces
3 tsp red chilli powder (adjust as per your spice level)
Juice of half lime or lemon
freshly ground black pepper
salt as per taste
for coating/batter:
½ tsp ajinomoto salt
¾ cup corn flour
2 tsp corn starch
2 tbsp corn meal (for crunchiness)
½ cup water
oil for deep frying
for garnishing:
roughly chopped onions and chopped cilantro

Method:
  • Clean and cut chicken into one inch cubes and marinate with the first five ingredients in the list. Marinate overnight or at least 2 hours in the refrigerator.
  • Prepare batter with rest of all ingredients from the list, add enough water to make a smooth batter similar to pancake consistency.
  • Pour the batter over marinated chicken cubes, mix nicely so that all pieces are coated well. Deep fry the chicken pieces batch wise.
  • Drain excess oil on a paper towel and garnish with freshly chopped onions and cilantro. Serve hot!!!
  • The leftover pieces (if any) can be stored in a ziploc bag and heat it in oven at 350°F [176°C] or in microwave on high for 1 minute depending on the leftover quantity.

Simply Egg Mushroom Rolls


Simple and spicy Egg Mushroom Rolls

Ever since Usha of My Spicy Kitchen blogged these beauties I was very eager to make them. Simply egg mushroom rolls is an original recipe from What's for lunch honey, by Meeta. Egg Mushroom Rolls can be great for breakfasts, brunch ideas and anything to munch in between. We rather had it for dinner along with a side dish Roasted Butternut Squash with Rosemary and Balsamic Vinegar.


Simply Egg Mushroom Rolls

The recipe is very simple and easy and can be read from the above blogs. I used four eggs instead of six, beat it, seasoned it with freshly ground black pepper and salt and made four omelettes. For the filling, I diced some baby portabella mushrooms discarding their stems, because of their woody texture. Fried the diced baby portabellas in a tablespoon of butter with cumin/jeera. Added little chilli powder, salt and garam masala powder. Stuff this mushroom filling into the prepared egg crepes or omelettes, garnish it with chopped cilantro or parsley. Thats it!

Thank you Meeta for this wonderful recipe!


My Bite: Egg Mushroom Rolls with Butternut Squash


Yesterday night we had Roasted Butternut Squash with simply Egg Mushroom rolls.

Sunday, September 7, 2008

Through My lens ~ Guess!


Can you guess what are these?
Let me know what do you think about the above picture


About photo: taken in bright sunlight without flash.
Camera: Sony Cybershot DSC-P100 5.1 mp

"Through my lens" is a new series of food photography. An idea to portray beautiful things I indulge in every day life and share the moments with my friends and visitors to my blog. This series will primarily focus on food and things related to it.

Lunch Box Pasta ~ Penne in creamy tomato sauce


Penne in Creamy Tomato Sauce

If you ask me which is your addictive new cuisine? without any second thought I will say Italian! Yeah I became more comfortable trying Italian cuisine after coming to this country. Thanks to Giada, I learned to cook delicious and wonderful Italian recipes from Food TV.

But I admit that I don't like much cheese in my food. So I adjust accordingly and make paste with penne being one of my favorite shape amongst all. This is one yummy recipe that I tend to make again and again, week after week and never lets me down. I make this weekly once for JB and he loves to take in his Lunch box, thence the name!


Penne in Creamy Tomato Sauce


Recipe Source: My Own
Cuisine: Fusion Food, Italian Cuisine
Preparation time: 20 minutes
Cooking time: 15 minutes

Ingredients:
2 cups pasta, uncooked
1 cup pasta sauce, store brought(I use Tuttoroso or Ragu brand)
1 shallot(onion), diced thinly
3-4 cloves of garlic, minced
2 tbsp roasted red pepper homemade or store bought
2 tbsp parsley, freshly chopped
¼ cup light cream or half-n-half
½ tsp red chilli powder/karam (optional)
¼ cup freshly grated parmesan cheese
a bunch of fresh basil, chopped
2 tbsp extra-virgin olive oil
freshly ground black pepper
salt as per taste
8 cups water

Method:

  • Cook pasta as per the instructions on the packet.
  • Take a large sauce pan, heat oil and sauté shallots and garlic. Add salt to sweat the shallots and season it with freshly ground black pepper.
  • Now add pasta sauce, chilli powder, salt and let it cook for a minute. Then add freshly chopped parsley, chopped roasted peppers and cream or half-n-half to it. Let it cook for a couple of minutes.
  • Taste for salt and pepper, add the cooked pasta, mix well. Add chopped basil and top it with freshly grated parmesan cheese.
More Pasta recipes:
Penne with Parsley Pesto and Zucchini
Orzo with lemon, feta, cranberries and methi sprouts (Pasta salad)
Spaghetti with roasted pepper medley

Friday, September 5, 2008

Brussels Sprouts Stir fry


Admit it, when was the last time you ate Brussels sprouts? I was indulged in these beautiful cabbage buds (to me!) one year back when I saw at some one's blog and thought of giving it a try. Though I was skeptical initially, but started to cook with Brussels sprouts quiet often and now it has become one of our family favorites. JB loves having Brussels sprouts with chapatis, rotis or rice and dal.

Brussels sprouts can be cooked in many ways. Some like to eat it raw, some boil it, some roast it, some stir fry it while some bake it. There are many yummy recipes available in the food blogosphere! But only one basic formula: Treat this veggie as you do with cabbage and it will justify its presence in the dish you make with it.

Many people like to have it when the Brussels sprouts are well cooked. Check this article on San Francisco Chronicle I bet you will go back to this veggie again and again! I am making Brussels sprouts stir fry with the spice mix I blogged last week. Now sit back and enjoy the show....oops recipe!


Brussels Sprouts Stir fry with peanut garlic spice mix


Recipe Source: My Own
Cuisine: Fusion Food
Preparation time: 10 minutes
Cooking time: 20-25 minutes

Ingredients:
12-15 Brussels sprouts
1 shallot(onion), diced thinly
2 tbsp roasted red pepper homemade or store bought
2 tbsp peanut garlic spice mix
salt as per taste
½ tsp red chilli powder/karam (optional)
for seasoning/temepering/tadka/poppu:
1 tsp cumin/jeera/jeelakara
1 tsp mustard seeds/rai/avaallu
2-3 dried red chillies, roughly torn into two pieces
3-4 curry leaves
2 tbsp olive oil

Method:
  • Clean the brussels sprouts, remove any loose leaves and chop them into bite size.
  • Heat oil in a large sauté pan, add all the ingredients under tempering list and fry for a minute. Turn heat to medium high, add diced shallots, hit some salt and this will sweat the shallots. Add roughly chopped roasted red pepper and diced brussels sprouts.
  • Sauté on high for about 10 minutes, if required sprinkle some water and cook it till done.
  • Lastly add the peanut garlic spice mix and cook for another two minute until it is mixed well.
  • Serve with rotis or rice.

Thursday, September 4, 2008

Ganesh Chaturthi Prasadam~ Pala Thalikalu


Ganesh Chaturthi celebrated in my home

Ganesh Chaturthi was celebrated on 3rd Sep 2008 all over India and this year also we celebrated this festival with full devotion and joy in the company of our friends and family. Enjoyed all the tasty prasadams and naivedyam offered to Lord Ganesha. I already blogged my last year's celebrations, if interested have a look.


But what is unique this year is I made Ganesh Idol out of all-purpose flour (maida) and decorated with the throne and ornaments brought from India.


For this occasion I made Kudumullu, Uppu Undrallu, Semiya payasam, Chakkari Pongal, and Pala Thalikalu as prasadam/naivedyam (food offerings to God). I already blogged recipes for Kudumullu, Uppu Undrallu, Semiya Payasam and Chakkari Pongal/ Pramanannam. I am blogging only Pala Thalikalu here in this post.

Pala thalikalu aka pammulu payasam is a milk pudding with rice dough strings shaped in small snake like shapes thence the name! This recipe is my newest attempt to make pala thalikalu and I successfully made them. But only thing is many strings got melted and only few left so I captured this picture for you to understand what I made. Not bad though, for first attempter!


Pala Thalikalu - Prasadam for Ganapati
Recipe Source: My Friend
Cuisine: South Indian, Andhra
Preparation time: 20 mins
Cooking time: 30 mins

Ingredients:
4 cups milk (whole or 2%)
1 cup rice flour/biyappu pindi
1-
½ cup sugar
½ cup grated coconut/kobbari, fresh or frozen
4 tbsp sesame seeds/nuvvulu/til, toasted and crushed
1 tsp cardamom powder/elaichi powder
few strands of saffron/kumkuma puvvu
2 tbsp crushed nuts like cashew,almonds and pistachios
1 tbsp clarified butter/ghee/neyi
2 cups water

Method:
  • Boil water in a big, deep vessel/saucepan. Add ghee to it and stir in sifted rice flour.
  • Stir in with a wooden spoon and see that there are no lumps formed. Once all the rice flour is mixed well with water switch off the gas. Cover and let it cook.
  • Knead the dough while it is still hot, wet your hands with water and divide the dough into small 2 inch balls and later shape into long strings. Keep aside and let it dry for 10-15 minutes.
  • Meanwhile boil four cups of milk, once it comes to a full boil add sugar, cardamom powder, saffron and let all the flavor blend well on medium heat for about 10 minutes.
  • Add the prepared rice strings and let it boil for another 7-10 minutes.
  • Add grated coconut, crushed nuts and crushed sesame seeds for garnishing
  • This tastes good hot or cold.
Tips:
  • The more thick you make rice dough strings the better. It will maintain its shape in the milk sauce/pudding, else it will end up being brittle, broken or melted.
  • You can make the strings with chakli press but be careful that the strings might melt down in the milk sauce/pudding.
  • Don't boil the milk pudding/sauce for more than 10 minutes.
Check my last year's post on Ganesh Chaturthi Prasadam

Wednesday, September 3, 2008

Happy Ganesh Chaturthi 2008

|| Om Ganeshaya Namah ||
|| वक्रतुंडा महाकाय कोटी सुर्य समप्रभः ||
|| निर्विग्नम कुरुमे देव सर्व कर्येशु सर्वदः ||

May Lord Ganesha Bless you with the best things in life.
I wish all my family members, friends, and my readers a Happy Ganesh Chaturti

Ganapati Bappa Morya..... Mangal Murti Morya...

Sunday, August 31, 2008

Peanut Garlic Spice mix


My mother-in-law's Peanut Garlic Spice Mix

Everyone's kitchen has some secret ingredient to grab the show. Today I am sharing with you all one such spice mix my mother-in-law taught me. This secret spice mix recipe has some basic and minimum ingredients which can turn any curry memorably delicious! My MIL makes it before hand and stores in refrigerator for later use.

This post has been sitting for a long time in my drafts and deserved to be published earlier, my bad!

Source: My Mother-in-Law
Cuisine: South Indian, Andhra

Ingredients:
1 cup roasted peanuts/chanakkayalu
5-6 garlic cloves/vellulpayalu
10-12 curry leaves
2 tbsp cumin /jeera/jeelakara
2 tsp red chilli powder
1 tsp turmeric powder/haldi/pasupu
1 tsp salt

Method:
Dry roast the peanuts, cool and crush between hands to remove its skin. Combine all other ingredients with peanuts and grind it to a coarse powder. Store it in air tight container. Stays good in refrigerator for up to 2 months.

Usage: You can eat it with hot steamed rice with a dash of ghee/neyi/clarified butter. You can use it in any leafy curries using Palak, Thotoakura, Methi etc., or any squash or gourd curries using bitter gourd (kakarkaya/karela), ridge gourd (berakaya/turai), bottle gourd( sorakaya/dudhi), Ivy gourd(dondakaya/tindori), Okra(bendakaya/bhendi) or as per your imagination . It enhances the flavor and brings nice texture to the dish.

I already blogged one curry Koi thotakura fry using this spice mix and many more such stir fries and curries are coming soon from my kitchen. So keep visiting!

Our Breakfast on a Lazy Sunday!


French toast with a glass of orange juice and fresh nectarines

Everyone has those lazy days 'quota' at least once in a while if not often, knocking at our door. Probably sleeping overtime makes us feel more lazy and specially if it is weekend without plans (no traveling) or late night sleep or watching movies. This is a day when we ought not feel to do anything. On such moments I miss India badly, if I don't feel anything to cook, i can simply go for the street food that is readily available and fills your stomach and makes you wanting more cuddling in that comfy cozy sofa.


At times I feel my feet forcefully dragging me into the kitchen and my misty eyes staring at my refrigerator and wondering what to make something in jiff and something which is filling. One breakfast recipe comes to rescue me is "French Toast" I keep going again n again and never lets me down.


The recipe goes like this:
All you need is 4 slices of whole wheat bread , a pair each for both of us. Three eggs, dash of half and half , cinnamon and few tablespoons of granulated sugar. Thats it! and the breakfast is ready.

Beat the eggs, add a dash of half and half/light cream/milk or you can skip completely if not available. Add a teaspoon of cinnamon powder and 2 tablespoons of granulated sugar. Whisk and dip the bread into this mixture and arrange it on a hot oil-sprayed frying pan or griddle. Toast the bread on both sides and your French toasts are ready.


We had our breakfast with a glass of orange juice and fresh nectarines.

Friday, August 29, 2008

Ginger Peach Muffins


They were over so soon that I was able
to take photo
of these leftover muffins next day!

My Farm picking has indulged me in many new and different recipes. I loved cooking and serving the new recipes and each one is close to my heart. This ginger peach muffins I made for adorable Yash (my friend's kid) on his birthday. You must have seen him in the farm picking photos I posted previously. I found this recipe very fast, simple and easy.


Ginger Peach Muffins
Source: Virtual Cities
Cuisine: International ~ American
Prep time: 20 mins
Baking time: 25-30 mins
Serves: 6-8 people

Ingredients:
2 cups flour
½ cup sugar
2 tsp baking powder
½ tsp baking soda
½ tsp salt
2 eggs
½ cup butter, melted
1 cup plain yogurt
2 tbsp finely chopped crystallized ginger
1 cup fresh peaches, peeled and finely chopped
½ cup chopped pecans
Method:
  • Preheat oven to 400 °F [205°C]. Grease muffin tin with butter and set aside.
  • In a large bowl, combine dry ingredients.
  • In another bowl, combine egg, yogurt, and butter, then add ginger, peaches, and pecans.
  • Fold egg mixture into flour mixture. Fill greased muffin ½ to 2/3 full.
  • Bake in a 400 °F [205°C] oven for 25 minutes.
Variations: you can use nectarine instead of peaches
Other baking goodies from my kitchen:
Red Currants Mini Tarts
Cherry Rose Rolls
Buttermilk Blueberry Muffins
Banana Chocolate Chip Muffins

Ginger Peach Muffins


They were over so soon that I was able
to take photo
of these leftover muffins next day!

My Farm picking has indulged me in many new and different recipes. I loved cooking and serving the new recipes and each one is close to my heart. This ginger peach muffins I made for adorable Yash (my friend's kid) on his birthday. You must have seen him in the farm picking photos I posted previously. I found this recipe very fast, simple and easy.


Ginger Peach Muffins
Source: Virtual Cities
Cuisine: International ~ American
Prep time: 20 mins
Baking time: 25-30 mins
Serves: 6-8 people

Ingredients:
2 cups flour
½ cup sugar
2 tsp baking powder
½ tsp baking soda
½ tsp salt
2 eggs
½ cup butter, melted
1 cup plain yogurt
2 tbsp finely chopped crystallized ginger
1 cup fresh peaches, peeled and finely chopped
½ cup chopped pecans
Method:
  • Preheat oven to 400 °F [205°C]. Grease muffin tin with butter and set aside.
  • In a large bowl, combine dry ingredients.
  • In another bowl, combine egg, yogurt, and butter, then add ginger, peaches, and pecans.
  • Fold egg mixture into flour mixture. Fill greased muffin ½ to 2/3 full.
  • Bake in a 400 °F [205°C] oven for 25 minutes.
Variations: you can use nectarine instead of peaches
Other baking goodies from my kitchen:
Red Currants Mini Tarts
Cherry Rose Rolls
Buttermilk Blueberry Muffins
Banana Chocolate Chip Muffins

Thursday, August 28, 2008

Homemade Orange peel scrub


I know this post is not related to cooking. Its all about giving a breathing spa to your skin. Yeah, I am talking about ex-foliating your skin. Dead skin cells, tanning etc can effectively be got rid off by using ex-foliating scrubs. However, one should not use the scrub daily to ex-foliate. If your skin is oily you may need once a week. For more drier skin once a month is more than enough.

We all know that citrus fruits have some medicinal values either taken internally or used externally on our skin. One such use is making scrubs out of their dried peels. Do not throw away Orange, lemon or lime peels. Dry them out thoroughly until they are brittle but not under direct sunlight, that may reduce its medicinal effects and its natural oils.

You can use any citrus fruit peels in combination for making this scrub at home. Usually I take 10 to 12 orange peels (yields 1 cup of powder) for making this scrub. Remember this homemade scrub is suitable for all skin types. But reduce the usage as per your skin type.

Homemade Orange peel scrub
Source: My Mother

Ingredients:
1 cup dried orange peels
2 tbsp dry roasted blackgram dal/urad dal/minappapu
1 tbsp dry roasted red gram dal/toor dal/kandi pappu
2 tsp semolina/rava
1 dried rose petals
1 tbps sandal powder/chandan powder

Method:
Make the powder of dried citrus peels until smooth (but little coarse) in advance. Mix all the above ingredients and grind till it attains coarse powder texture. Store it in an air-tight container and ready to use.

Usage:
When you want to ex-foliate your skin, mix above scrub with warm milk, honey and a hint of rose-water to make a coarse paste. Before a bath, rub this all over your neck, arms, body and legs. Use rough circular motions as you go along to ex-foliate the dead skin cells. Bathe normally

For face take the same mixture and dilute with few drops of warm water. Gently scrub in circular motion and rinse with warm water. It's a wonderful scrub and so easy to make and the effects are immediately visible. You can notice squeaky clean feel that leaves behind. For dry skin use full cream or homemade butter instead of milk.

Variation: You can use varitey of citrus peels together viz., lemon, lime, grapefruit, clementine, orange, tangerine etc.

My Mother always used to prepare this scrub powder for me and my sister. She always wants her girls to look best!! Thanks Mommy.....

I am sending this to Jugalbandi for Click-August 2008 event.

Related Posts with Thumbnails